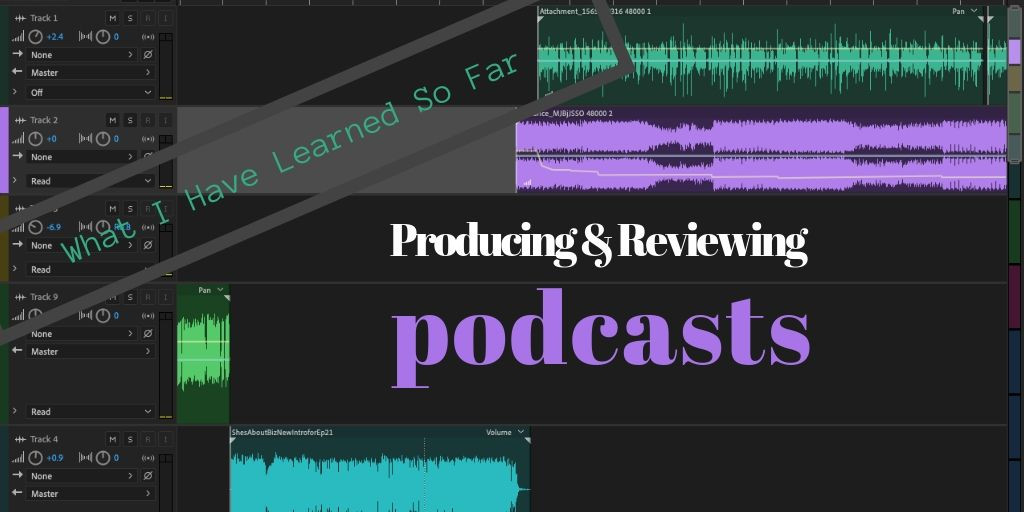
Producing and Reviewing Podcasts: What I Have Learned So Far
Adding a professional intro, recording in a different space, or changing a couple of settings can completely change the level of a podcast for the better. Most podcasters don't realize how great they can sound with just a little help.

To be totally honest, I stumbled into producing and reviewing podcasts. I was in the midst of re-starting my voice over business while, at the same time, listening to a ton of great podcasts. I also received some voice over orders for podcast introductions. Since I love audio production and used to work in radio creative services and imaging production, I thought I would give podcast intro production a whirl. I really enjoyed the work, but I also found that new podcasters had a lot of questions about getting started. I didn't feel totally comfortable with all the answers, so, I decided to start my own podcast. The Pro Voice Guy Podcast really started as an experiment, so I could figure out what I didn't know about podcasting.
Click here to get your own custom podcast intro starting at just $5.
Producing Podcasts?
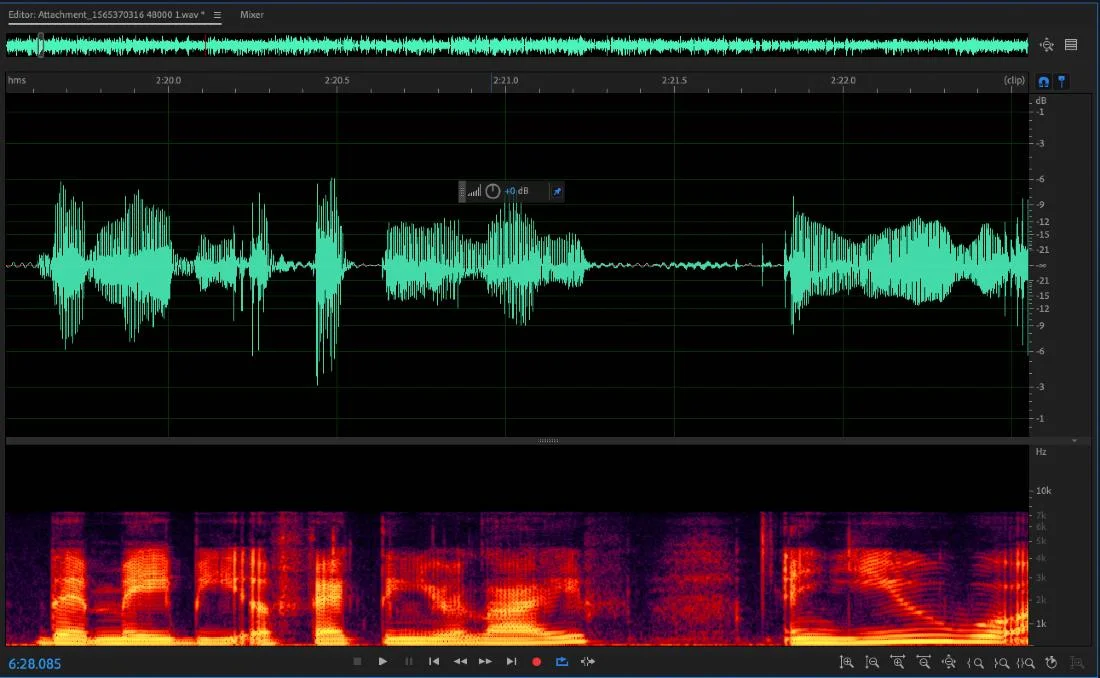
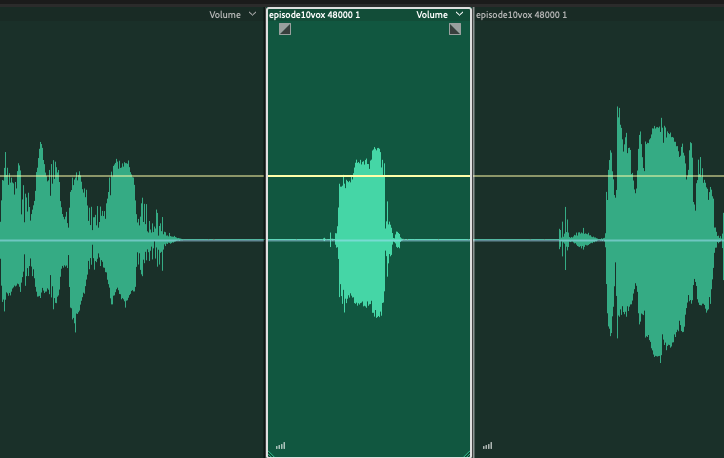
Using Adobe Audition’s Spectral Frequency Display to manually remove clicks from podcast audio.
The podcast intro work really took off. Along the way, I had a client ask if I could produce a whole show from her audio. I initially said no, but she was pretty insistent. So, since I was already producing my shows, I told her I would try it for a while to see if I could figure out a pricing model that would be affordable for her and still let me make some money. We are now on episode 40 of her show. And along the way, I added another show. I also work for several people who have me help with their programs when there is something extra that needs to be done. When some podcast hosts have an episode that needs extensive editing, have a syncing issue with an interview, or have some other audio problem that needs some specialized work, they hire me to help fix it.
Let me produce your podcast for you, starting at $25.
Just a Little Podcast Help
Once I started doing that, I began receiving smaller help requests. Someone asked me to listen to a show and see how it sounded. I listened and made some technical recommendations. From there, my Podcast Technical Review Service was created. It is usually just a one-time thing for most clients. It is fascinating to hear the improvements podcasters can make with just a little help.

A help image from one of my podcast technical reviews showing my client how to better mix the intro into the beginning of the episode.
Finally, I started seeing more requests for help in getting started. It becomes easy to become overwhelmed with all the details of starting a podcast. Some people just pick it up, and others need a little more help. For that, I added my "Getting Started with a Podcast" package. In this, I offer support and advice in just about any area of starting a podcast: hosting, recording, studio setup, vocal delivery, intros, software, etc.
Order my “Getting Started with a Podcast” package.
So, what have I learned so far from working with all of these great podcasters?
Small Changes can Make a Big Difference
Adding a professional intro, recording in a different space, or changing a couple of settings can completely change the level of a podcast for the better. Most podcasters don't realize how great they can sound with just a little help.
For Podcasts, Content is King
This isn't something I recently learned, but it is now even more apparent. Give me a show with great content and a few audio problems over a perfectly produced show with "blah" content any day. My only goal with podcasters is ensuring that lack of quality doesn't get in the way of great content.
A Lot of Podcast Audio Problems Can Be Solved in the Closet

A lot of podcast audio problems can be solved by recording in a closet full of clothes.
90% of the audio problems I hear on podcasts are related to the space they were recorded. I don't care how great your microphone is, if you are recording in a big echoey room you will likely sound like you are on speakerphone. If you are in a space with a lot of background noise, that noise will be distracting. (I once reviewed a podcast for someone and asked if they could record somewhere with less bird noise. Huge improvement!)
At the time, I was still cutting my own vocals in a closet because I hadn't gotten the sound of my studio quite right. So, I started recommending it to my clients, and some of them saw substantial improvements in their sound.
More Podcasters Should Ask for Help
That sounds like a sales pitch, and maybe it is. However, I hear so many good shows that could be great shows with just a little help. Podcasting is a great equalizer. There is nothing to stop an individual with no budget from creating a show that sounds as good as anything Gimlet Media produces. It might just take another set of ears and a little expertise to figure out what changes need to be made to take a podcast to the next level of sound.
Podcasters Shouldn't Wait for Perfection
There are too many podcasters stuck with a great idea and an inability to get started. Some people will tell you to get everything perfect so you can launch with your very best. Unfortunately, for some people, that means never launching. I am a fan of cutting some episodes and getting them out there. You can make it better as you go. Sure, if you have the time and resources to start with a flawless first show, great. But, I would encourage you to post that episode that still has a few kinks to work out rather than waiting and waiting until someday, it turns out your voice on that subject will never be heard.
I Love to Help
Helping podcasters is the best part of my job. Do you need some kind of help that I don't offer? Let me know, and I will find someone who can help or figure out a way to help you myself. I want you to have a great podcast!

Podcasting: How Can I Help?
I have the old whiteboard out and I am planning my upcoming blog posts and podcast episodes. It is always fun brainstorming topics and trying to find those things that podcasters will find helpful. I love guessing but, even more, I love hearing from podcasters. So, how can I help?

I have the old whiteboard out and I am planning my upcoming blog posts and podcast episodes. It is always fun brainstorming topics and trying to find those things that podcasters will find helpful. I love guessing but, even more, I love hearing from podcasters. So, how can I help?
If you have a topic you would like to hear covered on the blog or podcast (or maybe both) just let me know. If it is something I don't know about, I bet I can find someone who would love to share.
You can find me on Twitter @provoiceguy or on Facebook: facebook.com/provoiceguy

Starting a Podcast - Equipment, Software, Hosting, and More
Do you need help starting a podcast? That is what this blog and my Pro Voice Guy Podcast are all about. But, what if you need a little more hands-on help, customized to your needs? Through my relationship with Fiverr, I am now offering an opportunity to get personalized help starting your podcast.
Take a look at the video and click here for more information.
![Is it Okay to Read Your Podcast? [4 Quadrants of Show Prep] + [5 Script Tips!]](https://images.squarespace-cdn.com/content/v1/5a77344fbe42d6cd6a7bc3d5/1562614426269-F84UA6O45NFX5YN1R54P/Is-it-Okay-to-Read-Your-Podcast-%5B4-Quadrants-of-Show-Prep%5D-%2B-%5B5-Script-Tips%5D.jpg)
Is it Okay to Read Your Podcast? [4 Quadrants of Show Prep] + [5 Script Tips!]
A client asked me a question the other day that took me a moment to answer. She asked, "Is it okay to read your podcast?" I had to ask for some clarification. Her issue was that she was writing a complete script for her show and basically recording herself reading it. She wondered if that was okay. So, I asked for a recording of her show. Sure enough, it sounded like she was reading a script.
![Is-it-Okay-to-Read-Your-Podcast-[4-Quadrants-of-Show-Prep]-+-[5-Script-Tips].jpg](https://images.squarespace-cdn.com/content/v1/5a77344fbe42d6cd6a7bc3d5/1562613912629-LXCJ8TYWUFCN65CALJ3Q/Is-it-Okay-to-Read-Your-Podcast-%5B4-Quadrants-of-Show-Prep%5D-%2B-%5B5-Script-Tips%5D.jpg)
A client asked me a question the other day that took me a moment to answer. She asked, "Is it okay to read your podcast?" I had to ask for some clarification. Her issue was that she was writing a complete script for her show and basically recording herself reading it. She wondered if that was okay. So, I asked for a recording of her show. Sure enough, it sounded like she was reading a script. You don't need to be a broadcast professional to know what it sounds like when someone is reading vs. just talking. However, you would be surprised how often you think someone is just talking when they are actually following a word for word script. TV news broadcasters, late-night television hosts, and politicians are usually looking at a teleprompter and following it word for word. So, let's dig a little deeper into the question, "Is it okay to read your podcast?"
Your podcast is one of a kind. Even if there are hundreds of other shows on the same topic, there is no other exactly like yours. That is what makes podcasting so amazing. But, we can't help but listen to other shows and compare certain aspects. One of the biggest things I get questions about is vocal delivery. I have written before about how to make your voice sound better on your podcast but, for this post, I am going to focus on one particular area that has come up a lot in my podcast reviews: reading from a script.
For a moment, we are going to focus on shows that are not, regularly, interactive. In other words, I am not talking about shows that are mostly interviews or shows with multiple hosts, but rather podcasts that have one host who does most of the talking.
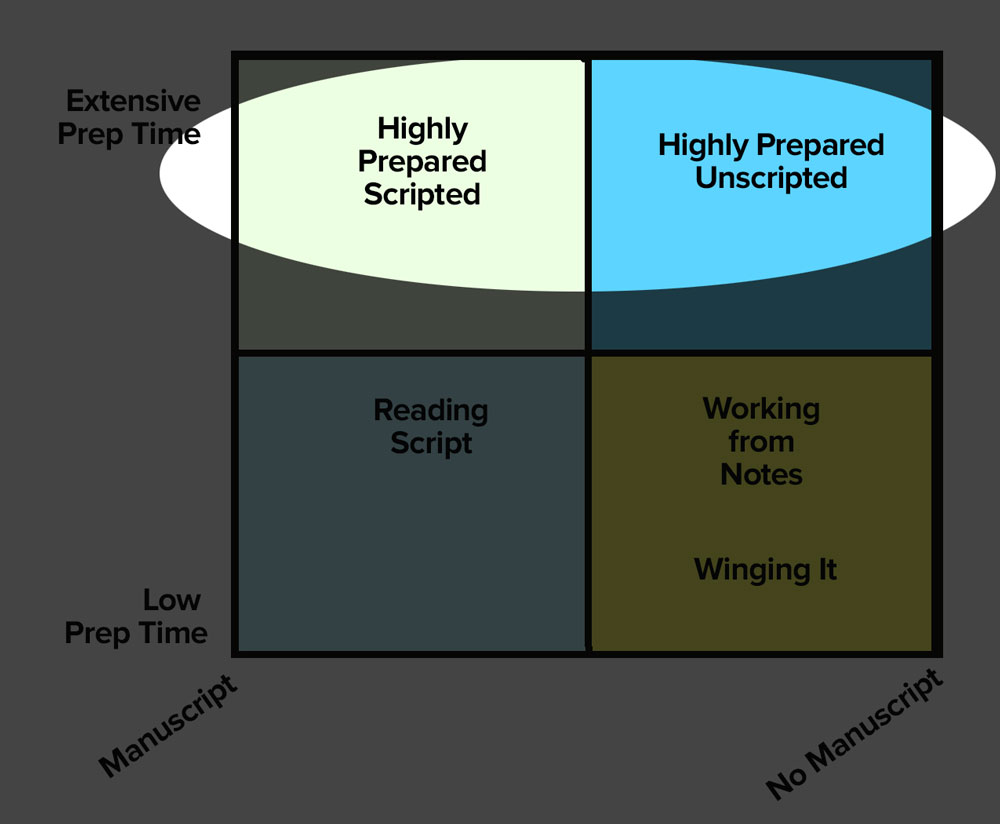
Manuscript vs. No Manuscript

Manuscript vs. No Manuscript for your podcast?
As we listen to podcasts, it can be hard to tell what is going on behind the mic. Most listeners love to listen to shows in which it sounds like the host is just talking to us. If we close our eyes and imagine the host in the studio, there is no script, no notes, just this person talking to us. However, unless they offer us a tell, there is no way to know for sure. So, let's look at some possibilities of what is going on behind the mic and then dig a little deeper at all the options in between.
1. Full manuscript - The host has written out the entire show and is, in essence, reading the podcast.
2. No manuscript - The host hasn't written anything all and is basically doing the show off the top of their head.
Chances are, you don't fall precisely into either of these camps. You are likely somewhere in between these two.
Now, it is rare that anyone is doing either in the full sense. Most podcasters fall somewhere in between. Maybe you don't have a manuscript, but you do have an outline. Perhaps you wrote a manuscript, but you then boiled it down into some notecards. Or maybe something else.
Prep Time
Now, I am going to add another axis. There is another factor to what is going on behind the mic: preparation time. You can't always tell, but sometimes, it is pretty clear that the host simply hits record and starts talking. Sometimes, the result is pretty impressive. Some people are just that good, they have a fantastic body of knowledge in their head, and are gifted in stringing the whole show together as they go. Other people, not so much.
So, let's add that to the chart.

How much prep time do you commit to your podcast?
Prep time can mean a lot of things. It can include writing a script, doing research, practicing, outlining the show, or for some people, just thinking about it. I know one podcaster that does research, takes a long walk, and then sits down and records the show. The walk is her prep time and she thinks about the research and decides how to approach the topic.
Putting Them Together
So, let's see how things intersect when we put these two things, manuscript vs. no manuscript and low prep time vs. extensive prep time. Again, these are just examples, every podcaster is different.

A four-quadrant matrix showing the impact of prep time and a manuscript on the sound of your podcast.
Again, when listening to a podcast, it is tough to tell what is actually going on with the host. This is especially true once we move up from low prep time to extensive prep time. At the bottom right of the matrix, we have low prep time and no manuscript. The bottom of the quadrant is basically "winging it." No prep, no script, just record and go. As we move up the prep-time axis, we get to the point of some prepared notes or at least some research. The lower left quadrant is blank at the very bottom. That's because, if you are using a manuscript, you need to take some amount of time to write it.
The bottom part of the matrix is where the difference is usually the most obvious.

The bottom part of the matrix is where the difference in a podcast is usually the most obvious.
While it is not always the case, I can usually hear the difference when there is low prep time. If someone has written a script and taken very little time to go over it and really know it, it sounds like they are reading. When a host doesn't have a manuscript and is just winging it or working from some notes, they can sound unprepared.
Experience and Talent
There are two things that don't show up on this matrix that can overcome a lack of preparation: experience and talent. As I wrote earlier, there are some podcasters with the experience and talent to hit record and deliver 30 minutes worth of content that is engaging, enlightening, and sounds like hours of preparation went into it. On the other side of that matrix, there are plenty of professionals that can read a script, having never before seen it and sound like they are speaking off the top of their head.
The top quadrants of the matrix are where it becomes challenging to tell the difference. Honestly, with enough preparation time, it becomes impossible to know if someone has a manuscript or is talking from notes or just off the top of their head. Prep time is the great equalizer. For those without a script, the prep time has helped them to be totally prepared and ready to go. For those with a manuscript, the additional prep time allows the host to really know the material and be comfortable with the script in such a way as to make it sound like they are just talking rather than reading.
So, let's go back to the initial question, "Is it okay to read your podcast?" The answer is yes, and no. If you are committed to taking the time to know your manuscript well enough that it doesn't sound like you are reading, then yes. If you can't take that kind of time, and it sounds like you are reading your manuscript, that will have a negative impact on your show. However, depending on your audience and your content, some listeners may be okay with it. You never know.
Five Script Tips for Podcasters
Okay. If you are going to read from a manuscript, here are five tips to make it sound more natural.
1. Write Like You Speak
One of the biggest problems some speakers have with manuscripts is that they write in a different way than they speak. Sometimes we write in a more formal style that doesn't reflect the way we really talk. Look for phrases that may be correct but don't sound like how you would actually speak.
2. Practice, Practice, Practice
If you are reading from a manuscript and you want it to sound like you are not – practice. This entails reading the entire manuscript out loud as though you are recording your podcast. In fact, it wouldn't hurt to record it and listen back to see how it sounds. It should sound a little more natural each time. Eventually, you may find yourself able to look away from the page more and more to gain a more natural delivery.
3. Memorize Important Phrases and Sections
If the practice isn't enough, try memorizing some critical parts of the show. Maybe memorizing your first opening paragraphs will allow you to start the show more naturally. Perhaps there are some complex thoughts that you really want to emphasize. Know them cold, and you can avoid that "reading" sound.
4. Create an Outline or Notecards
For those who have trouble sounding natural when reading from a manuscript, it can be useful to boil the main points into an outline or notecards. In the outline or on the cards, list the key points of each paragraph or section. Hopefully, those key points and words will jog your memory to what you wanted to talk about without having to read it.
5. Practice without a Net
The great thing about podcasting is that you can record a show and, if it doesn't sound right, you can do it again. Practice rehearsing your script and then putting it away. This can be done with or without an outline or note cards. If it doesn't work, you can always try again. But, you won't know if this is something you can do without trying.
Want a second opinion on the sound of your podcast? Learn more about my Podcast Technical Review. I will help you sound better by your next episode.

Is it Worth it? What Are You Hoping Will Happen?
Are you considering throwing in the towel on your podcast? Are you just starting a podcast and wondering if you will be able to push through enough episodes to really establish yourself?
I feel too many podcasters give up before they should. I could wow you with stats about how many episodes most podcasters last before giving up or abandoning their show. But, I am not interested in statistics. Instead, I am thinking about your show. You were excited when you started it, but sometimes you think it is time to move on. Maybe it is time. But, maybe it is not.
Some of the things that cause podcasters to call it quits:
It takes more work than you can afford.
It is not growing big enough, fast enough.
You've run out of stuff to talk about.
It has honestly run its course.
That's all fine. But what was your reason for starting in the first place?
Unless it is really time to call it quits, you can push through those other things if... and this is a big if... you know what you hope will happen.
Measuring Outcomes

What goals do you have for your podcast?
As a strategist, I think a lot about outcomes. If I were coaching you through starting a podcast, I would start with this question, "What are you hoping will happen?" If that didn't get a response, I would reframe it. "Close your eyes and think about a year from now. Your podcast is going really well. You know this because…" What are you measuring by? Is it a number of listeners? Is it income? Is it pushing traffic to your website?
What Does Success Look Like?
Let me ask that another way. "What does success look like for your podcast?"
If you can't answer that question, you may want to take a breath and work on a reply. There is no correct response. Your answer doesn't have to be the same as anyone else's answer.
Just for example, here are some possibilities what your definition of success might look like:
The podcast will be a success if 1000 people listen to each episode.
$2000/month in advertising revenue is what I would consider success.
The podcast will be successful if one person who is going through what I went through gets to realize that they are not alone.
Success for this podcast looks like 20 people who are struggling with their small business making a breakthrough.
I will consider my podcast successful If I get to interview three of the people whose writing has inspired me.
The show will be a success if I see a 10% increase in purchases on my website.
Your Vision of Success

What does success look like for your podcast?
Your vision of success doesn't have to look like any of those. However, if you want to keep moving forward, you need some goal to aim at. Without thinking through what you are hoping will happen, it is going to be very difficult to push toward that goal. Sure, some people just love the act of recording their podcast, if that is you, keep at it! For everyone else, you need to know what you are aiming for. Without it, you won't know if you’ve reached the level of success you're aiming for.
Think about it that way. What if someone asked you if your podcast was worth the work? How would you measure that? Is it worth what? What is the value of my podcast? I can't tell you if it is worth it if I don't know what I was trying to create.
Clarity Matters
Clarity answers with, "Yes, the 10% increase in sales is worth the 5 hours a week I spend on my podcast" Or, "Well I have been at this 10 weeks, and I have already gotten 3 letters from people thanking me for sharing my struggle so they wouldn't feel alone." Or maybe, "The 1000 listeners per episode is definitely worth the time I put in."
Podcasts don't last forever. At least none have yet. Even if you love your podcast right now, even if it is doing what you had hoped, there will come a day when you will have to look again at what you thought was success and see if that is still a goal for you. If not, it may be time to move on. If so, it is good to ask again, "Is it worth it?"
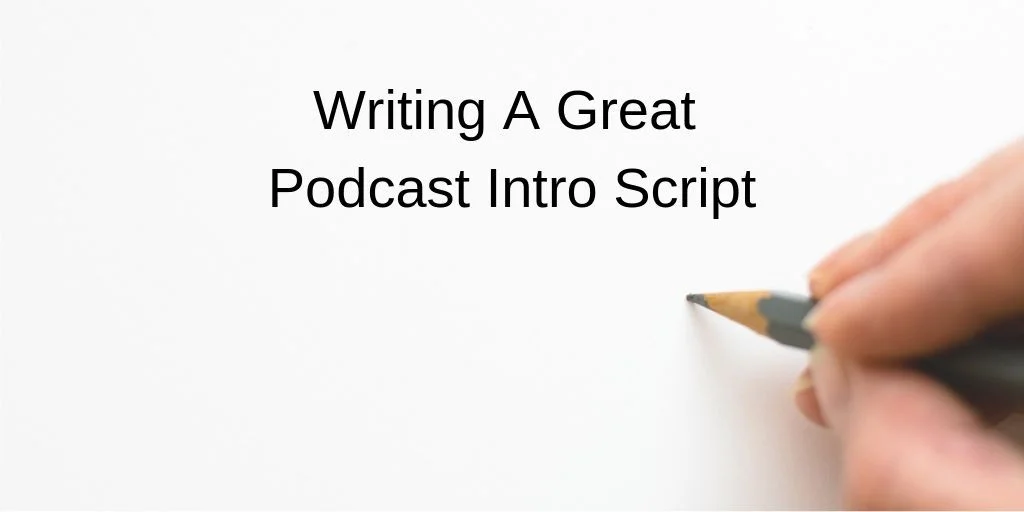
Writing A Great Podcast Intro Script
I get a lot of questions from podcasters looking to create the perfect podcast intro script. Sometimes they are hiring me to provide the voice over or even produce the entire intro. Other times, I have clients who will be providing the vocals but want me to take care of the music, effects, and production. I do offer podcast intro script writing services, but this is something that many podcasters can take care of themselves. Sometimes people ask me for an example of a great podcast intro script or some guidelines for what should go in there.
I get a lot of questions from podcasters looking to create the perfect podcast intro script. Sometimes they are hiring me to provide the voice over or even produce the entire intro. Other times, I have clients who will be providing the vocals but want me to take care of the music, effects, and production. I do offer podcast intro script writing services, but this is something that many podcasters can take care of themselves. Sometimes people ask me for an example of a great podcast intro script or some guidelines for what should go in there.
I have written a post called, "Podcast Intros, Catching Your Listeners Attention," which goes in depth into what makes a great intro but here, I am going to focus on the script itself. As I wrote in the previous post, there are a couple of different ways to approach the intro. But, for the purposes of this post, let's look at the anatomy of a simple, single intro that covers everything.
Honestly, there are some great podcasts that break all the rules and create an intro that is nothing like this. They may not even use an intro at all. But for those who are looking for the basics, a great podcast intro script will feature the following elements, welcome, show information, and host introduction. Let's look closer at each element.
Podcast Intro Script Part 1: Welcome
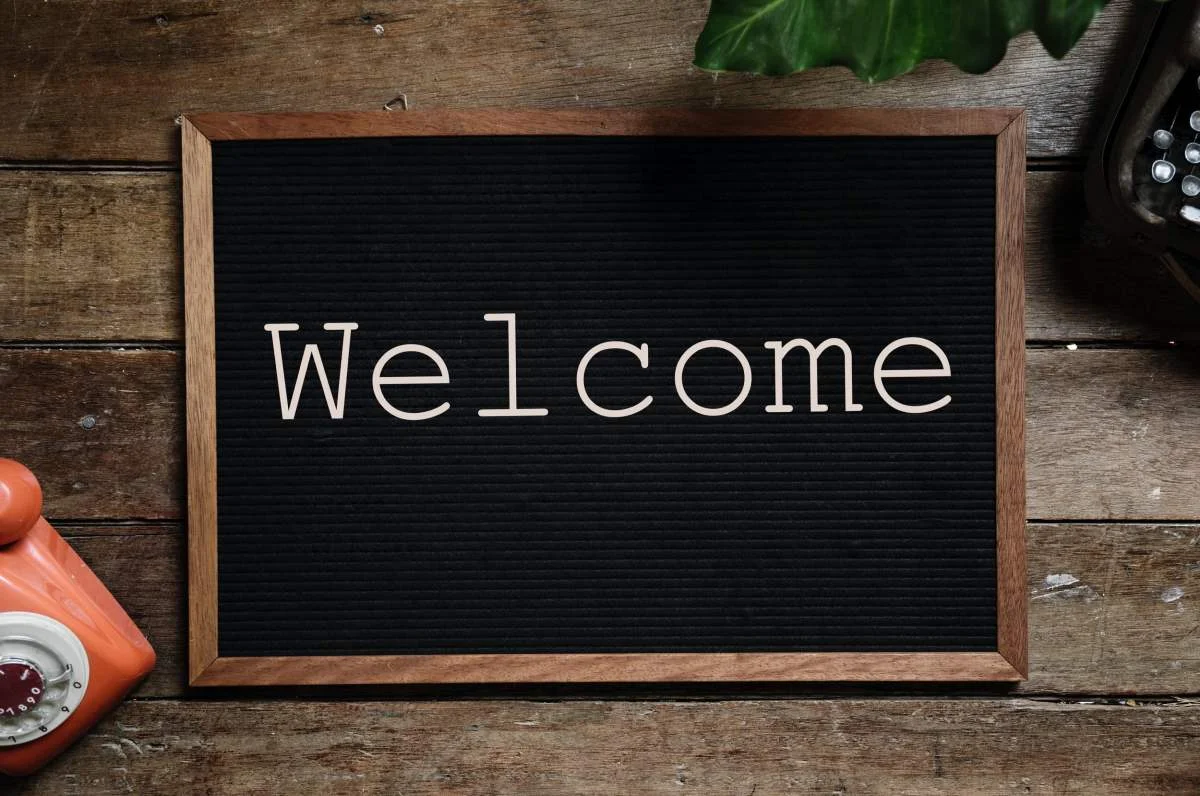
The welcome is the first part of your podcast intro script.
These are the very first words your listener is going to hear, so make them count. You have watched and listened to enough programs on TV, radio, and the web to know how this goes, "Welcome to the Insert Your Show Name Here Podcast." There are a bunch of variations on this theme.
Welcome to the Insert Your Show Name Here Podcast
It's time for the Insert Your Show Name Here Podcast
Get ready for the Insert Your Show Name Here Podcast
You are now listening to the Insert Your Show Name Here Podcast
Those are just a few possible variations. If you don't refer to your podcast as a podcast, there are other variations, like:
Welcome to the Insert Your Show Name Here Show
It's time for Insert Your Show Name Here
Get ready for another edition of Insert Your Show Name Here
You can also get creative with this part if you want to add some distinctive flair. For instance, my intro starts with "Live from the Pro Voice Guy Studios in San Antonio, Texas." I am not sure why I added it, but I like it.
Podcast Intro Script Part 2: Information

Share information about your show in your podcast intro script.
"What is this podcast about?" It’s a fair question that you should address in your podcast intro script. Some podcasters really struggle with this. Having worked with a few podcasters on this issue, I have found two possible reasons. Sometimes, they really don't know what their show is about. This is not usually a good sign. Other times, they have just never needed to express it in short form. Every podcaster who wants more listeners should be able to explain their show in one or two sentences. Think of it as your elevator pitch. If you are on an elevator and someone says, "Oh, you have a podcast? What is it about?" you should be able to sell it before one of you gets to your floor. My show pitch has two versions, the single floor ride, "It's a podcast about podcasting," and the skyscraper version, "It's a podcast designed to help people get started with podcasting or make improvements to their current podcast."
If someone is listening to your podcast, they don't want to listen to a long explanation of what your show is about. They just want to know, and then (hopefully) they want to listen to the show.
Podcast Intro Script Part 3: Host Introduction

The final piece of your podcast intro script is introducing the host.
The final piece is introducing the host or hosts of the show. For those who watch a lot of late night TV, this is where the announcer shows off their vocal prowess and often extends the host name into a nearly comically long version. Yours doesn't need to do that. It just needs to inform the listener who is going to be talking and provide a nice transition into the show. There a couple of different approaches to this depending on how much you need to say about yourself or the host. Many times it is okay just to offer your name. Other times, it might be helpful to add some credibility by sharing some extra information or credentials. This is especially true if the host has some claim to be an expert in the field and isn't already widely known for that. For instance, if your podcast is about a medical topic and you happen to be a doctor that specializes in that field, or if it is about marketing and you have extensive experience, these would be good things to share.
Once you have figured that out, there are a lot of formats that can get this done.
"And now, please welcome your host, Your Name Here, (optionally: Your Credentials.)"
"Here is your host, Your Name Here, (optionally: Your Credentials.)"
"Let's get started, here is, (optionally: Your Credentials) Your Name Here."
Okay. Since some people are just looking for some podcast intro scripts that they can copy, paste, and revise, I am going to put together a couple based on these elements. I am going to create them using my information so I can stop typing "Your Name Here."
Podcast Intro Script 1
Welcome to the Pro Voice Guy Podcast, a show about helping your podcast sound great. Here is your host, voice over talent and podcast producer, Will Rice.
Podcast Intro Script 2
It's time for another episode of the Pro Voice Guy Podcast, a podcast about podcasting, and now, your host, Will Rice.
Podcast Intro Script 3
Live from the Pro Voice Guy Studios in San Antonio, Texas, this is the Pro Voice Guy Podcast, a show about helping your podcast sound great. Please welcome your host, Will Rice.
A Final Word
Your podcast intro script can be as unique as your show is. These are just some ideas to help you get started. What you come up with is only limited by your creativity.
If you need help with writing, need a voice, or need a fully produced podcast intro, I would love to help. Head over to my podcast intro page for more information.

Podcasting: The Interview (5 Tips)
Interviews are one of the most fascinating aspects of podcasts. There are, of course, some podcasters (like me) who have never featured an interview. But, for some podcasters, interviews are the lifeblood of every episode. For others, they are an occasional feature.
Whether interviews are a regular feature of your podcast or, if they only come along every once in a while, you want to do everything you can to make them sound great.
In this post, I am going to focus on in-person interviews. There are many ways to record interviews and technology has made interviewing someone in a remote location easier than ever. But sometimes, you get to be in the same space as your guest. This creates some opportunities not available when your guest is talking to you over the phone, Skype, or other connection. However, it also has its own unique challenges.
Professional podcasters often have access to broadcast-grade studios, designed and equipped for flawless sounding audio with multiple participants. Most podcasters don't have this luxury. That's okay. The point here is to make the best of what you have and make your interviews sound as professional as possible.
Here are 5 tips to help your in-person interview sound great:
1. Choose a Good Space to Record Your Podcast Interview

Interviews may not work in the same place your normally record your podcast.
Many podcasters have found excellent acoustical spaces in which to record their podcasts. Unfortunately, sometimes the place where the show is typically recorded isn't well-suited for guests. I know a bunch of podcasters who record their shows in the closet and not every guest is going to feel comfortable joining you there. Moving to a bigger space makes things more comfortable, but it may come with its own acoustical challenges.
In my post, "Making Your Podcast Sound Better," [https://www.provoiceguy.net/blog/podcast-tips-making-your-podcast-sound-better] I cover some tips for choosing the right space or improving the sound of your current space.
No matter what space you are in, the acoustics are going to become more challenging with a guest. The fact that you have to record an additional voice adds the potential for a lot more room noise and echo. If you are using a separate mic for your guest, you will have a second live mic picking up background noise and echo. If you are sharing a mic, likely you will both be a little further away than usual meaning the gain will need to be increased and with it, the room noise.
2. Take Full Advantage of Your Microphone

An image of a bi-directional pattern similar to that on a Blue Snowball or Yeti.
It is excellent if you have separate microphones for you and your guest, but some podcasters simply can't afford that yet. However, if you have the right mic, you still have some options. One of the most popular brands of microphones for podcasting, Blue, offers adjustable pickup patterns in both their Snowball (though not the Snowball Ice) and Yeti microphones.
If you are using a Snowball, you have the option to switch the pattern to omnidirectional. That will allow the mic to pick up sound coming from all directions. This allows your guest to sit across a table from you for a natural interview setup. Just remember, with an omnidirectional pattern, you will be picking up sound coming from every part of the room.
With a Blue Yeti, you have even more flexibility. It also has the omnidirectional option, but it also has a bidirectional setting. This will pick up sound only from the front and back. The setup can be the same as mentioned above. However, there will be substantially less room noise as the mic will only record sound coming from the directions of you and your guest.
What if I Don't Have One of these Microphones?
In the right space, any decent microphone can get reasonable results. The most important thing is to pay attention to your microphone's pickup patterns. If your device has only one pattern, you will need to be sure you and your guest are positioned correctly. Most single pattern mics have a "cardioid" pattern, meaning they capture the sound directly in front of the mic. This means that you and your guest will both need to be on the same side facing the mic. This may be a little uncomfortable, but it will ensure the best possible sound.
3. Wear Headphones (if Possible) for Your Podcast Interview
If at all possible, the host should wear headphones during the interview. I recommend headphones all the time since they can help you hear what the mic is picking up. This is especially important during an interview. It would be disappointing to find out later that there was a distracting noise in the background or the guest's level was too low.
I realize that this is not possible for everyone. Depending on your setup, you may have to deal with headphone latency issues. In other words, if your headphones are plugged into your computer, the sound in your headphones may be delayed just enough that it is too distracting to listen. You can avoid this by using a microphone with a built-in headphone jack like the Blue Yeti, or using an analog mic plugged into a digital audio converter.
If latency is an issue, or headphones aren't an option, here is what I recommend. Record some test audio with you and your guest (or use a stand-in guest) and listen back for any issues.
4. Don't Talk When Your Guest is Talking
At first glance, this may look like some form of interview etiquette or good behavior. However, I am sharing this from a technical perspective. It is difficult to conduct a great interview without the occasional moment of the guest and the host talking at the same time. However, from a technical perspective, avoid it whenever you can. Why? Two reasons: levels and editing.
Many podcasters are recording their interview to a single audio track and sometimes with a single mic. This means it can be difficult to adjust for differences in audio levels. For instance, if on listening back, you realize that your host audio is much louder than your guest, it is not as simple as raising or lowering the gain. Raising or lowering the gain will change the whole track both the host and guest. There are some workarounds for this but, they are much more difficult to deal with when two people are talking at the same time.
Another problematic thing about the guest and host talking at the same time is editing. Often, when editing someone's podcast, the host requests an edit at a certain point in an interview. If the host and guest were on separate, isolated audio channels, this might be a quick edit. But, when they are not, the edit often becomes impossible because, while the guest paused, the host was still talking. An easy edit turns into a situation where it is nearly impossible to make it sound clean.
5. Consider Using Multi-Track

The Rode Rodecaster is an all-in-one multi-track podcast production board.
If you are conducting interviews as a regular feature of your podcast, you may want to consider recording in multi-track. Multi-track recording is the process of recording separate audio tracks from multiple inputs at the same time. For instance, you might record your host audio on track one and your guest audio on track two. Conveniently, later you can add music and transitions on additional tracks.
When you are done recording and editing, you can "mix-down" the multiple tracks into one (for mono) or two (for stereo.) In this mixing process, you can independently adjust the levels, EQ, and effects on each track. This is standard work I do when editing podcasts. Perhaps the guest is louder than the host, and I can even those levels out and also add compression or EQ differently to each track.
This may require some equipment or software upgrades. You will need at least two microphones. If they are USB mics, you can just plug them in. If you are using analog mics, you will need a digital interface that accepts more than one mic. Common audio software such as GarageBand, Audacity, and Adobe Audition have multi-track recording built in. There are also many field recorders that are set up for recording multiple tracks for multiple sources.
The one thing to remember is that all of the tips still apply. Although having each person on their own channel gives you more flexibility to fix problems in post-production, it is better to eliminate the problem in the recording.
This is especially true for number 5. Unless you happen to be in a professional studio, or you have your guest in a separate room, a little bit of both voices will end up coming through both mics. You might try to mute one channel and realize that much of the sound is still present as it was picked up on the other mic.
Final Thoughts
Don't let any of this scare you away from interviews. I would rather hear a great interview with a few audio problems than miss out on the information and interaction. However, my technical tips are always about not letting anything get between your content and your audience.
If you would like those interviews to sound better, consider picking just one tip at a time and slowly improve your interview audio until it sounds just like the pros!
Looking for some help and insight for making your podcast sound better? Get a technical review of your podcast for just $5. Order now on Fiverr.

Podcast Technical Review
Do you want your podcast to sound better and more professional? Are you wondering where to start? I can help.
I hate to see audio issues get in the way of great content. I have heard some podcasts that have fantastic content and fascinating hosts but so many audio problems that it is just too difficult to listen.
Others aren't that bad, but the first impression created by a lack of professional audio quality reduces the show's credibility.
If you think your show might have some audio problems or, if you don't know, let me take a listen and see what we can improve.
Click here to order your Technical Podcast Review.
What is Included:
Here is what I will do:
Listen to your podcast
Identify issues
Offer you concrete recommendations to sound better on your next episode
Some of the issues that I will listen for are:
Equalization - Does your podcast sound too "tinny" or "muddy?"
Mixing - If a podcast has any musical elements, it is crucial that they are mixed well with the vocals.
Editing - Most podcasters aren't trained in audio editing. Sometimes edits don't sound as good as they could.
Encoding - Problems with sample rate and bitrate can cause all sorts of problems.
Microphone - Just getting your microphone in the right place can make a huge difference. Sometimes a new mic, even an inexpensive one can completely change the sound of your show. I can also make recommendations as to what mic to buy.
Noise/Acoustical - Very few podcasters have access to a professional studio. Bad room acoustics and ambient noise can reduce the quality of your sound. Fortunately, there are some things you can do to make it sound better.
I will share my findings with you in a language you can understand even if you are not an expert. I will also give you concrete steps to fix the issues I find.

Improving Your Podcast: The Crutch
There are a lot of tips for improving your podcast. In this post, I am going to share something that you can get rid of to improve your podcast: the crutch.

There are a lot of tips for improving your podcast. In this post, I am going to share something that you can get rid of to improve your podcast: the crutch.
What is a Crutch?
Editing an “umm” out of a podcast.
What is a crutch? For this post, I am talking about a word, phrase, or sound podcasters (or anyone who speaks to an audience) use when they need a moment to think about what they will say next. Verbal crutches come in all shapes and sizes, but any of them can have a negative impact on the sound of your show.
I first learned about verbal crutches back in my radio days. I sat down with my program director every week to listen and review segments from my show in what we called an "aircheck." Quite often, as part of the session, she would instruct me to remove a word or phrase from my vocabulary. She said that I was using those words as a crutch. Instead of adding any value or meaning to what I was saying, I was merely using those words whenever I needed to pause and think of what I was going to say next.
Crutches are not only superfluous, but they can also get annoying. At first, You might not notice them in your recordings but, but now that it has been brought to your attention, if you listen back after reading this post, you might notice your own.
“Crutches are not only superfluous, but they can also get annoying”
Common Crutches for Podcasters
People are pretty inventive with crutches, but here are some popular examples. Many podcasters just starting out go with the most popular versions which aren't really words at all.
Popular Crutches for Podcasters
"Umm."
"Uhh."
Don't feel too bad if you use these generously. You are not alone. These are popular with more than podcasters. Even experienced speakers will throw these in, especially when they are nervous or answering tough questions. When editing podcasts for others, these are the most common words clients ask me to get rid of.
Many speakers quickly learn to get rid of these most basic sounds. Practice and experience help us grow more confident and slowly eliminate the "umms" and "uhs." However, we replace them with more advanced crutches.
Intermediate Crutches for Podcasters
"You know?"
"Right?"
"Soooooo"
"You know what I mean?"
None of these phrases are inherently wrong. It is not the phrases themselves but, instead, how we use them. You can tell by listening back to your recording. When you say, "You know?" is it something that you said purposefully, or did you add it in to give yourself a pause to get to your next thought?
Advanced Crutches for Podcasters
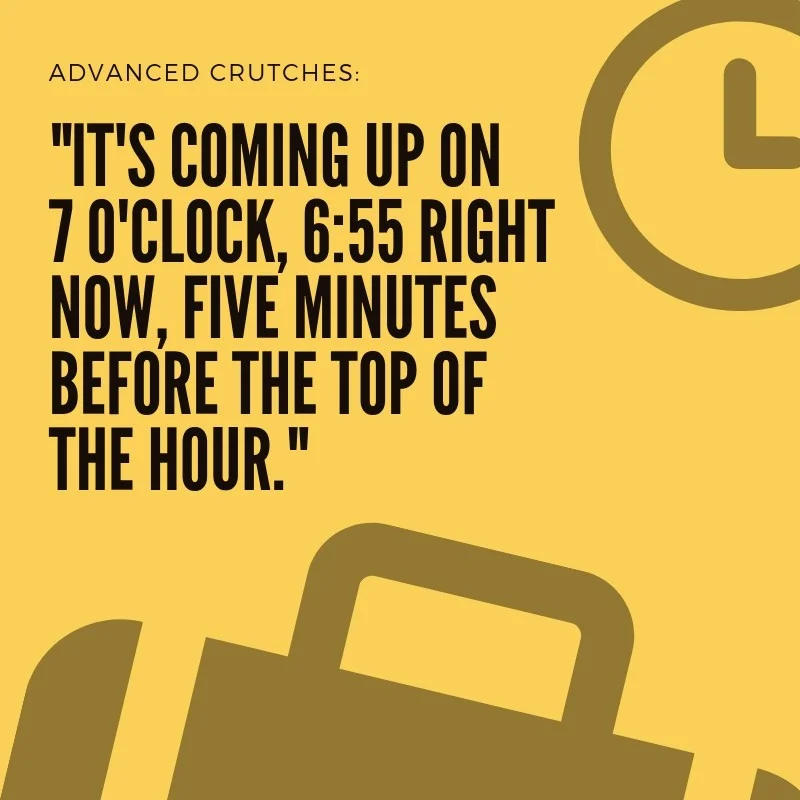
When I was on the air every day, much to my program director's dismay, I got pretty creative with crutches. When doing live radio, there is usually a lot going on. While I was talking, I might have been listening in my headphones for the traffic reporter to be ready, trying to cue up the next song, and trying to find the notes for the live spot coming up. Sometimes I just needed to speak on autopilot for a moment. That's where "advanced crutches" come in. I could say, "It is 6:55 am." But, as I was trying to figure out what was coming next, I might have said, "It's coming up on 7 o'clock, 6:55 right now, five minutes before the top of the hour." That gave my brain a whole bunch of time to think while I was talking. However, it is just not a great use of words.
“So, what do I say instead?”
If you decide to get rid of those crutches, what are you supposed to say instead, especially when your mind is trying to catch up with your mouth? Try this: nothing.
Saying nothing takes practice. Most people naturally detest silence. This is especially true for people new to speaking into a microphone. But, as you might have noticed, there are some people who don't include pauses wherever and whenever they are talking. But give it a try.
One way to do this is to write your favorite crutches on a post-it note right in front of you with a line drawn through those words. I promise you, it will feel awkward at first. But, when you need to take a mental pause, try just pausing instead.
“If you decide to get rid of those crutches, what are you supposed to say instead, especially when your mind is trying to catch up with your mouth? Try this: nothing.”
Here is what you might notice. At first, you may sound a little awkward because just trying to avoid those words is going to use some brain power. This might cause you to stumble more or need more time to think about what to say next. Once you get more comfortable, you will likely notice that you have more pauses in your recording. Don't let that worry you.
When I am editing podcasts and removing "umms" and "uhs" I don't always edit out their space in the recording. I might edit out 20 "umms" and end up with a recording that is the same length? Why? Removing those "umms" and replacing them with silence creates a little pause in the recording that sounds perfect. Human speech naturally includes pauses.
Just listen to some professionally produced podcast and pay attention to the pauses. You may notice that pros pause more than you noticed before.
As you practice, you may notice that your pauses get shorter. That is because, eventually, your brain will no longer have to pause first to remind you "don't say 'umm.'
Now For The Bad News
Once you eliminate your most common crutches, you will likely find new ones. You probably won't even notice unless you listen back to your recordings with a critical ear.
A couple of weeks ago, I was editing my own podcast, and I realized I was saying "right?" quite a bit. I had added a new crutch. So, I deleted almost all of them. However, as much as I like editing, spending time cutting that word out of my audio over and over isn't time well spent.
Just a little more bad news. For most people, this can be difficult. Honestly, when you first try to do this, you may decide after listening back to your first attempt, that you want to go back and re-record it. That's okay. It will be good for you in the long run.
Now the Good News
Working through this is going to make you a better podcaster and a better speaker in general. Most listeners won't even notice that you have crutches. They won't be able to name the reason that your show is sounding better. But it will sound better. That means that people will have a better chance of truly connecting to your content and that is what it is all about.

How YOU Can Sound Great on Your Podcast (5 Voice Tips)
How can you sound great on your podcast? Practice!
Like it or not, if you are the host of your podcast, you are the "voice talent." I have written before that you don't have to have a "great voice" to have a great podcast. Podcasting is a great chance to share YOUR voice. Your voice works perfectly for your content. So, forget what people sound like when they are selling cars or telling you about new movies. Just be you.
What I want to do is help you be the best you possible. I have picked up some tips through the years using my voice professionally that can help you sound even better on your podcast. The nice thing is, none of these is extraordinarily difficult, and they don't require years of training.
Sound Better on Your Podcast Tip 1 - Stay Hydrated

Staying hydrated will help you avoid extra mouth sounds.
The first tip is something your doctor will tell you to do anyway. So, even if you throw in the towel on podcasting, you should keep doing this. But here is why it is essential for you as a podcast host: It will make you sound better.
First of all, if you are dehydrated, it is going to make it tough to talk for very long. Even if your podcast is only five minutes long, that is a long time to speak without interruption. That is especially true if you are a little nervous, which many people are sitting in front of a mic the first few hundred times.
Second is a term that may be new to you: mouth clicks. You might not know until you sit in front of a decent microphone, but our mouths make a lot of noise other than the words that come out. We make pops, whistles, and most annoyingly, clicks. You might not even know what they are when you hear them. The sound like small clicks or pops on your recording. An occasional mouth click can sometimes be edited out with your audio software. But, if they are happening all the time, it can make your podcast hard to listen to.
The best way to avoid mouth clicks is to stay hydrated. They tend to happen when our mouth is dry, which is often a sign of dehydration. Drinking a glass of water just before you begin won't cut it. You need to get that water into your body early enough for your whole body to become hydrated. So, the best bet is to make sure you are drinking plenty of water. In a pinch, when you find yourself dehydrated and "clicky" but need to record, eating a green apple will often help. The acid in the apple can break up the effects of your dry mouth and keep you sounding clear, at least for a little while.
Sound Better on Your Podcast Tip 2 - Breath
I hope you are already breathing regularly! But, most people don't think of the impact breathing has on sound. If you are recording something longer than a few seconds in length, you are going to need to inhale, and that is perfectly okay. But, you don't want that inhale to be so pronounced that it is distracting. Breath control is a skill voice artists need to master. Getting better at it can make podcasters sound better and more professional.
For the most part, for podcasters, this is just about getting more control of your breathing. If, when listening back to your show, you hear a lot of big inhales, you may need to practice a bit.
Practice taking more air into your lungs – This will help you go longer without taking a breath.
Master the short inhale – Sometimes, when you are speaking a long phrase, you can't make it all the way through without taking a breath. Instead of stopping for a big inhale, you may find that you can take a quick, short breath to carry yourself to a natural pause.
Have a clear path for your air – Check your posture, especially your neck position. You may find that you are unknowingly constricting your airway, limiting the air that is going out and coming in and creating more noise than necessary.
Inhale with less sound – By doing all of these things, you should find that you won't be quite so desperate to take a breath. This will allow you to focus on making your inhale a little quieter. You can also improve this with practice. Some of the next tips will help you cut down the sound even more.
Sound Better on Your Podcast Tip 3 - Watch Your Mic Position
Proper mic position can help you sound better on your podcast.
The short answer to the question, "Where should my mic be?" is, "In front of your mouth." Of course, it is more nuanced than that. In general, hold your hand out in front of you, spread your fingers wide, then, turn your hand so your thumb is right in front of your mouth and your pinkie finger is nearly touching the mic. That should be just about right. Too close and the mic will likely pick up more mouth sounds than necessary. Too far and you will pick more room noise than necessary. That is especially problematic if your recording space is less than desirable.
Distance isn't the only factor. Especially if you are using a condenser microphone, your precise position in relation to the microphone can change the sound it reproduces. With my Sennheiser MK4, most of the time, I try to speak about a hand's distance away and just over the top of the mic. This captures the resonance of my voice while missing some of the mouth sounds I don't like. Sometimes, if I don't like the sound, I will back off a little bit. Other times, if I want a more intimate sound, I will cut the distance in half and get right up on the mic.
Once you get comfortable with your mic, it is okay to move a little bit. If I need to take a big breath, I pull back a little bit from the microphone. If I need to emphasize a word with a P at the beginning, I turn my head just a bit to it doesn’t pop on the mic.
Sound Better on Your Podcast Tip 4 - Tongue Twisters!
Yes! Tongue twisters! These are still one of the best ways to warm up before recording as they stretch out all the muscles you need to speak clearly. Getting adequately warmed up will keep you from tripping over your words. This can also help you with reducing some mouth noises, especially pops and sibilance. Try reading the one about Peter Piper and his peppers right in front of your mic. Then practice and experiment with mic positioning until you don’t hear any pops.
Practicing with tongue twisters will also improve your diction and make you more comfortable behind the microphone.
Sound Better on Your Podcast Tip 5 - Listen

Listening back to your podcast audio will reveal ways to make you sound better.
One of the best ways to improve your vocal quality is to listen back to your work. Many new podcasters hate this part. You are not alone if you don't like the sound of your voice when playing back a recording. It has something to do with the fact when we are talking normally, we hear our voices both the usual way, through sound waves in the air, and also through vibrations in our head. So, we sound different when we aren't talking. There is also a psychological factor. We don't listen all that carefully to our voice when we are talking and hearing it disembodied on a recording can feel weird.
If we want to present the best version of our voice, we need to put that aside. We need to find a way to listen critically, but not in a way that makes us want to give up podcasting. For what we are talking about today, we want to listen to anything that distracts from the content. Some of the things to listen for (some of which I mentioned earlier) are pops, clicks, whistles, smacks, big breaths, rustling paper, room noise, buzzes, microphone adjustment noises, jangling jewelry, and even noisy clothing.
Of course, you may be able to use your software to get rid of some of these, but the best plan is to eliminate them in the first place. Listen to your audio with a critical ear, listen for trouble, and then go back over the tips to see if you can get rid of some of the extra sound. Your podcast will sound even better in no time. Don't forget to keep listening. You never know when some new noise will creep in!

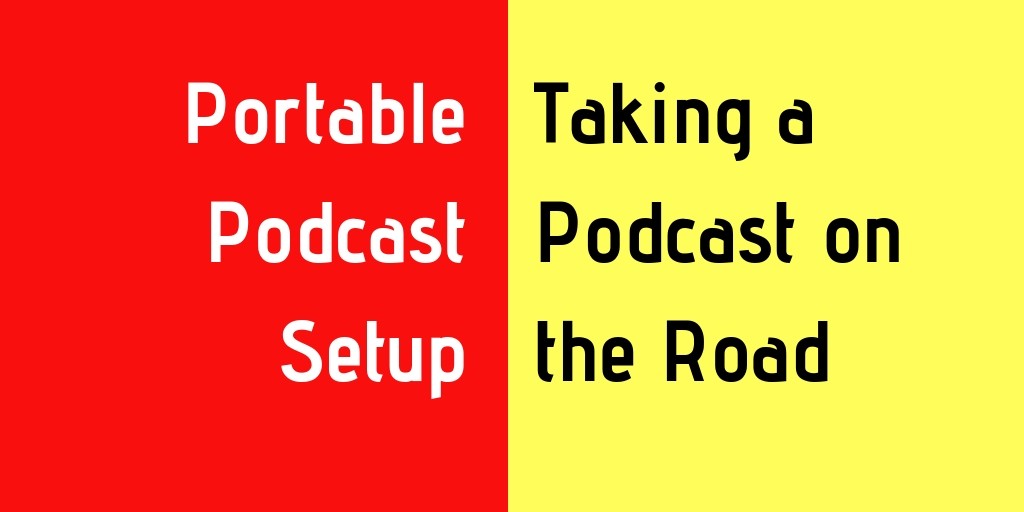
Portable Podcast Setup - Taking a Podcast on the Road: Some Equipment Options
Are you looking for a portable podcast setup? Do you need some mobile podcast recording equipment options? Take a look.
Are you and your podcast ready to boldly go where no podcast has gone before? Or, maybe you want to occasionally record your podcast at another location. Or, you don't have a permanent recording space, so your gear needs to be easily moved.
Fortunately, given the fantastic equipment available on the market, portable podcast recording is cheaper and easier than ever. Some of this stuff is so good, you may keep using it when you find yourself in a permanent location.
Portable Podcast Setup Options

You can certainly use your laptop and other equipment for your portable podcast setup but it isn’t always ideal.
You can certainly take your laptop on the road with you for your portable podcast. USB mics are pretty portable. Even if you are using analog mics and a digital audio converter, these things are all quite portable. So, one option is to take your regular studio on the road. That doesn't always work. I have a professional studio that I use every day for voice-over work. So, there is no way I am moving anything.
There are also some locations where a regular studio setup isn't practical for a portable podcast setup. Sometimes power may be an issue. You could likely record an entire podcast with everything running off your computer's battery. But, that would make me a little nervous. Some robust external battery packs will give your laptop more hours. There may be places where a computer isn't practical for other reasons, especially outdoor locations. Bright sun, a drizzle, excessive heat, or just a lack of a flat surface can make the laptop impractical.
Portable Podcast Setup: Recorders
If you are not dragging along your computer and studio gear, you will need to find another way to record. Good news, digital audio recorders keep getting better and better. It still blows my mind that I can plug XLR cables into inputs that provide phantom power and record multiple tracks of better-than-cd-quality audio on a device that I can carry in a large pocket.
There are a ton of options in this space. What you need depends on two things:
1. The number of inputs you need.
2. How much you are willing to spend.
There are plenty of other differences between the various makes and models but, for portable podcasters, the number of inputs will be a significant factor. The bells and whistles on these devices tend to get better as the price increases. But, for the most part, when the price goes up, so does the quality of the microphone pre-amps. And those, are the most crucial part. To a trained ear, there is a difference in sound quality between the cheapest and most expensive digital recorders. However, even the cheapest ones are likely going to be good enough for most podcasts. I like to start with the best quality audio possible so, spend as much as you can afford.
All of the options listed are true "multi-track" recorders. What does that mean? It means that each of your inputs can record to a separate track. This means that you can adjust the levels, add effects, and edit each track. However, on-site multi-track recording isn’t always fool-proof. If the sources are too close together, you often end up with cross-talk. That means that someone vocals may end up bleeding through to another track. This isn’t the fault of the recorder. It is just that their voice is picking up on someone else’s mic.
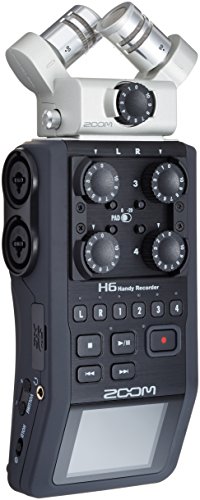
Zoom H6 Six-Track Portable Recorder - For portable podcasters with multiple guests.
This is a fantastic device. Four professional XLR connections all with phantom power! For those who aren't total audio geeks, that means you can plug in up to four condenser microphones (they are the ones that require phantom power to work) via XLR cables. It also features ultra-quiet microphone pre-amps, so no extra noise gets into your recording.
It can record up to six tracks of audio in MP3 or WAV to an SD card. It also has a built-in X/Y microphone capsule. Many podcasters won't need this, but it sure is handy to have if you want to pick up ambient noise or have a chance to record something cool. These mics are so good that, in a pinch, and in the right space, you could record vocals. These capsules are also interchangeable, so you can switch it out for an optional shotgun mic, a "mid-side" mic, or even an attachment that allows you to connect two more XLR cables.
The only thing I don't love about this is the price, around $400. But, it is worth every penny.
Zoom H6 Six-Track Portable Recorder $399 (Amazon.com)
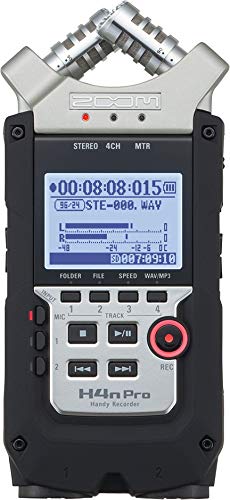
Zoom H4N PRO Digital Multitrack Recorder - If two mics are all you need for your portable podcast setup.
If two microphones are the most you will ever need, you can get the magic of H6 for about half the price. You also lose access to all those interchangeable mic capsules, but you still get the X/Y mic.
Zoom H4N PRO Digital Multitrack Recorder - $219 (Amazon.com)

Marantz Professional PMD-706 96kHz 6-Channel DSLR Recorder - A budget option when you need four mics.
I want to love this option, but I don't have enough information. I laid my hands on my first Marantz back in college when they made the industry standard cassette field recorder. But, I haven't had a chance to do a thorough review of their digital offerings. And, online reviews for this unit are few and far between.
Going on features alone, this is a fantastic offering for under $300. Like the Zoom H6, the Marantz has four phantom-powered XLR connections.
If you need to plug in 4 microphones, this might be worth giving a try.
Marantz Professional PMD-706 $299 (Amazon.com)
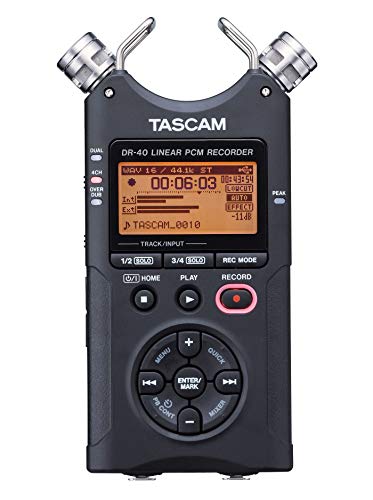
TASCAM DR-40 4-Track Portable Digital Recorder - A portable podcast setup workhorse.
I have been delighted with Tascam's digital recorder options. I have worked with a number of them and find the recording quality excellent. What I have been less satisfied with are the controls. I find the menus too hard to navigate and important options too difficult to find. But because of the quality and durability of their products, I keep buying them.
This one offers two phantom-powered XLR connections. It also offers a unique built-in microphone setup that switches from X/Y to A/B.
TASCAM DR-40 4-Track Portable Digital Recorder $199 (Amazon.com)
Wait? Can't I Use My Phone or Tablet for My Portable Podcast?
Well, you can. And, I am working on a post about the best options for external microphones and interfaces for mobile devices. In theory, it works fine. Done correctly, you could record some excellent sound. But, I still have reservations. I can only think of one time a dedicated digital field recorder failed me. And, that one time might have been due to a faulty SD card reader, not the recorder itself.
On the other hand, my iPhone has a bit of a history of failing to perform on the simple task of recording audio. Sometimes a glitch in an app has caused it to shut down. Another app once just stopped recording for no reason. Still another time, a different app crashed as it was supposed to be saving. And, of course, once, I forgot to charge my battery fully and had the phone die at some point, erasing everything I had recorded. Phones and tablets are also very susceptible to heat. If you are recording outside in the sun, the device may shut itself off when it decides it is too hot.
Microphones for Your Portable Podcast Setup
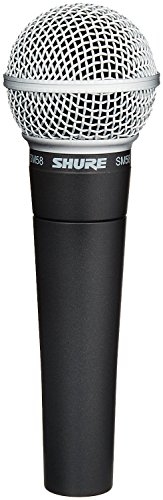
I was close to only offering one recommendation in this category. The Shure SM58 is so legendarily great and outstandingly durable, it is hard to offer anything else. But my understanding of podcaster budgets convinced me to add a cheaper alternative.
Shure SM58-LC Cardioid Dynamic Vocal Microphone - The Industry Standard
These microphones sound great and are one of the most durable mics on the market. In my radio days, we used them for anything that was recorded or broadcast outside our studios. I have dropped more SM58s than I care to count and, when I picked them up, they sounded exactly the same. These are used by pros every day, and it is astounding that you can pick one up for $100. More than likely it will outlast every other piece of equipment you buy.
Shure SM58-LC Cardioid Dynamic Vocal Microphone - $99 (Amazon.com)
Keeping those on a budget in mind, especially for those who need to buy more than one, here are three more options. These certainly won't have the impressive sound quality or durability of the SM58, but they sound decent and should hold up with regular use.
Audio-Technica ATR-1500 Cardioid Dynamic Vocal/Instrument Microphone $29.95 (Amazon.com
Behringer Ultravoice Xm8500 Dynamic Vocal Microphone, Cardioid - $19.99 (Amazon.com)
Shure PGA48-XLR Cardioid Dynamic Vocal Microphone $39 (Amazon.com)
Other Stuff You Might Need for Your Portable Podcast Setup
Since you are going to be out and about, make sure you have everything you need.
Here are a few things you need in your portable podcast setup bag:

Cables
I always recommend packing at least one more cable than you need. If you take good care of your cables, they will last a long time. But, if one shorts out while you are in the field, a backup can save the day.
Cable Matters 2-Pack Microphone Cable (Mic Cable/XLR to XLR Cable) 10 Feet - $18.00 (Amazon.com)
SD Cards
You can get a lot of audio on an SD card. On a 32 GB card, you can capture over a day of 48kHz, 24-bit audio. However, I still recommend carrying an extra. That is mostly in case you get out in the field and remember that your SD card is still in your card reader at home.
SanDisk 32GB Ultra Class 10 SDHC UHS-I Memory Card $9.07 (Amazon.com)
If your field recorder takes a microSD card, these should do the trick.
SanDisk Ultra 32GB microSDHC UHS-I Card with Adapter $7.41 (Amazon.com)

Headphones for Portable Podcast Setup
You can always plug your earbuds into your field recorder. However, I like to have a little more control over what I am hearing.
Audio-Technica ATH-M30x Professional Studio Monitor Headphones, Black $69.00 (Amazon.com)
These do a great job of keeping the background noise out without completely isolating your from the world. They also offer a clear representation of your actual audio without any extra warmth of bass, so you can really hear what is going on. I use these daily in one of my studios and they have held up well, especially for under $70.
A Few More Things for Your Portable Podcast Setup
Unless you can plug in, don't forget batteries... lots of batteries. You may also want to pick up some windscreens for your microphones. And, unless you want people to hold their mics, some mic stands would be nice.
I also like to carry a table with me. Honestly, TV trays work fine, but I love these portable stands from PylePro.
Universal Laptop Projector Tripod Stand - PylePro PLPTS2 $26.99 (Amazon.com)
As always, if you want your show to begin with style, I would be happy to help out with a custom podcast intro.

Podcasting Tips: Using Software to Make Your Podcast Sound Better - EQ Part 2
There is no reason your podcast can't sound as professional as shows with dedicated studios and $2000 microphones. Well, your podcast might not sound that good. But, it won't take much to take your podcast from sounding like something you put together at your kitchen table to something that sounds professional. In this series, I have been sharing some of the ways software can help with this.
In the last post, we looked at the different kinds of equalizers (EQs). Below, I will take a closer look at different frequency ranges and how you can adjust settings to fix common problems that many podcasters face and enhance the sound of your voice and podcast.
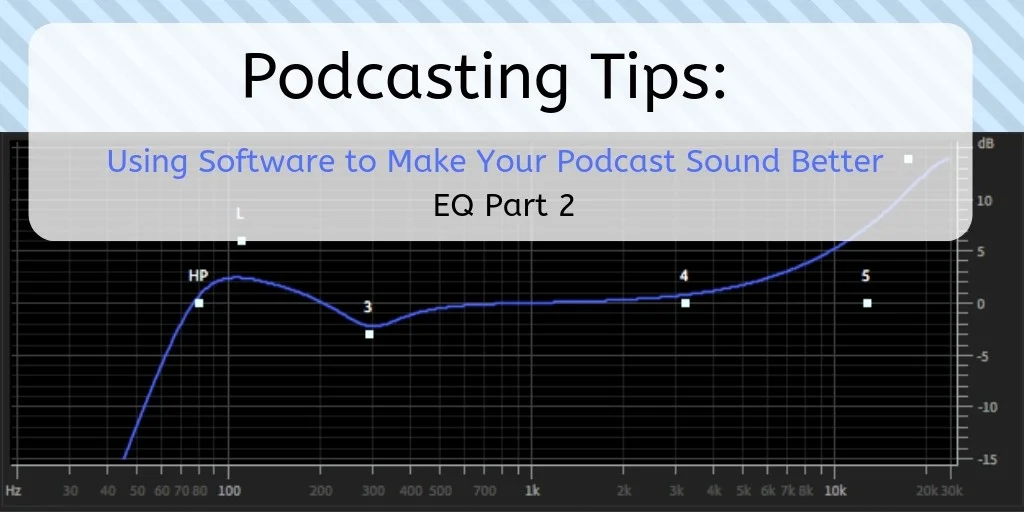
Use Your Ears
When working to make your podcast sound great, use and trust your ears!
Before we jump in, here is something to remember. Just like with all the other effects I have written about in this series, your ears are your most important tool. Listen carefully to any changes you make. If it doesn't sound better or if it sounds worse, undo it and try again!
Also remember, while equalization is math and science, the process itself is more of an art. I am offering frequency ranges and suggestions. However, every voice and studio is different. These are guidelines to get you started but, in the end, your vocals should sound great.
It is also recommended that you start by cutting, not by boosting. It is better to reduce audio data we don't need instead or raising the overall level and leaving the unnecessary sounds in the mix.
Let's start at lower frequencies on the spectrum and work our way up. The lowest frequencies are on the left side of the equalizer and move higher as we move to the right.
Podcast EQ: Below 80 Hz

Podcasters can achieve a better sound by reducing unnecessary frequencies.
There is not a whole lot to hear down here when it comes to the human voice. If you are trying to add more bass to your voice, this won't likely work. Instead, reducing these frequencies will get rid of some unnecessary signal and clean up the recording. This is also where you may hear some audio unpleasantries like plosives (popping p’s and other mouth noises), mic adjustments, bumps, and even the occasional rumble from an HVAC system.
Podcast EQ: 100 Hz – 300 Hz
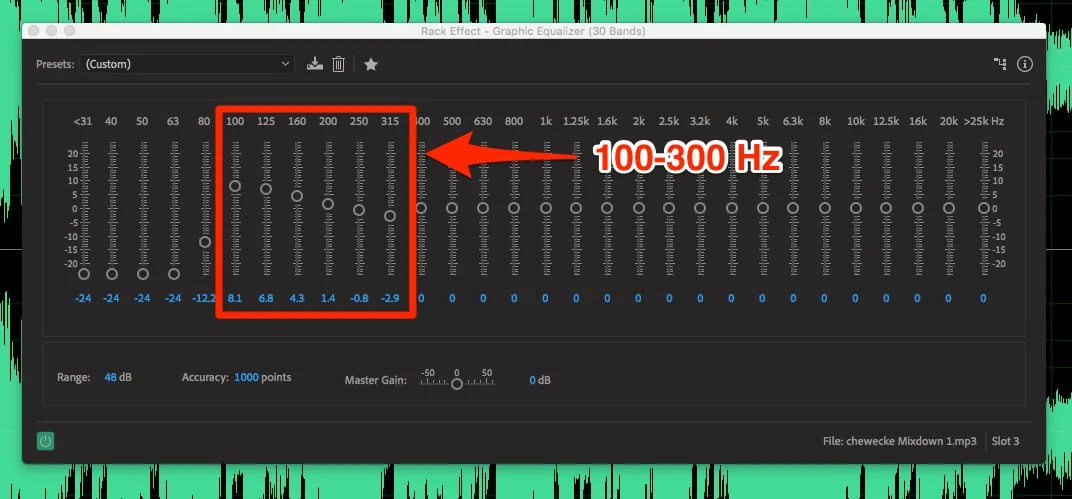
Podcasters can remove some of the “boominess” in their recording by making adjustments in the 100-300 Hz range.
Once you have moved up past the 80 Hz range, the sounds become more critical. At this point, we are still in the low range and this where the bass and sometimes boominess lives. This is where your ears start to become significant. If the bass and/or boominess of the voice is reducing clarity, some minor cuts of gain in these frequencies will help. On the other hand, if the voice sounds too thin a slight boost at the right point in this range can add some thickness and presence. It takes small changes and experimentation to get this just right.
Podcast EQ: 300 – 400 Hz

When using EQ for a podcast, try some reductions between 300 and 400 Hz to reduce muddiness.
As we move up towards the midrange, this is a range that makes a big difference in sound quality. Broadly, 300 Hz all the way up to 1 kHz is an area that we might hear some of the defects of the recording space. This is where some of the room reflections – echo or reverb – might be heard. If you are looking for a more professional "studio sound" a minor reduction somewhere in here might do the trick.
More specifically, look at the 300 – 400 Hz range to remove any muddiness from the recording. Try some minor reductions in this area to get rid of the mud and make the vocals sound more clear.
Podcast EQ: 2 – 5 kHz

You can add some clarity and warmth to your podcast by boosting in the 2kHz - 4kHz range.
For the most part, unless you have some particular recording issue, frequencies from around 400 Hz all the way up to 2 kHz can remain flat. Once you reach 2 kHz all the way up to about 4 kHz, you are in an area that can improve clarity and warmth.
If reductions in the 300 – 400 Hz range left some muddiness and you are looking for more clarity, try some minor boosting in this frequency range.
Podcast EQ: 4 – 7 kHz

You can reduce the harsh “s” sounds in your podcast by making some cuts in the 4-7 kHz area. Just remember, you can also use a deesser.
If there is a lot of sibilance in your recording, this is the area you should experiment with. Sibilance is the unpleasant sound that comes from our voice's "s" sounds. If, instead of pleasant sounding s's, z's, and even sh's, try some minor narrow cutting in this range.
Chances are the sibilance is in a very narrow frequency range. It can help to boost bands in this area one by one until you find the one where the sibilance lives. Just find the range where it really becomes pronounced and then try reducing that band.
If that doesn't work or it takes away any clarity, you might try using a DeEsser plugin.
Stick With It and Keep Listening
That's it for now. Audio engineers spend their entire careers mastering EQ. Where I went to college, we had a whole audio engineering department, and they spend endless hours listening and adjusting to become EQ masters. You aren't going to get there overnight. Fortunately, you are likely dealing with one or two voices (maybe more if you have a lot of guests.) Once you find the perfect balance, you can save it as a preset and not need to do this work every time. However, do yourself a favor and review your settings every once in a while. You will find that your ears have become more sensitive and you might hear more room for improvement. Also, if you make any changes to your studio like your microphone, microphone placement, sound conditioning, etc., go back and give it another review.
If you need help or you just don’t have the time to make your podcast sound great, I would be glad to help!
Pro Voice Guy Studios now offers full podcast production.
Also, coming soon, all sorts of podcast technical coaching options. From guidance in purchasing and setting up equipment to Audition and Audacity templates tuned to your podcast. Those will be available soon. Just can’t wait? Drop me an email.

Podcasting Tips: Using Software to Make Your Podcast Sound Better - Part 3
Ready for more podcasting tips? In this series, we are talking about ways to make your podcast sound better. There is no reason for sound quality to get in the way of your content. Your podcast can and should sound as good as professionally produced shows. And, you don't need to spend a ton of money. All you need to do is learn how to use your software.
So far we have covered compression, normalization, and limiting. In this post and the next, I will look at equalization or (EQ).
Equalization is, at the same time, the simplest, and the most confounding bit of processing you can do. Most people have at least some experience with EQ. Maybe you once had an equalizer on your home stereo or have messed with the bass and treble on the stereo in your car. This is the same concept. What makes it confounding is that I can't just tell you how to set the EQ. Your EQ settings depend on a nearly endless array of factors. Your voice, microphone, recording space, use of music, other processing, and desired finished sound all play a part in the EQ process. Minor adjustments can make a drastic improvement in your overall sound or make it miserable to listen to.
What is EQ? (And what does it have to do with podcasting?)
Equalization (EQ) is the process of adjusting the levels of specific frequencies within an audio signal.
Equalization (EQ) is the process of adjusting the levels of specific frequencies within an audio signal. For simplicity, let's look back at the car stereo or other devices that have controls for bass, treble, and maybe midrange. That is a very simple EQ. You can turn the low frequencies (bass) up or down. You can do the same with the high frequencies (treble.)
Equalizer plug-ins in modern audio software give you a lot more control. They enable the manipulation of the levels on more specific frequency ranges. For this post, we will be looking at two different types of equalizers: graphic and parametric.
Proper equalization is important for all the elements of a production. In podcasting, your voice will be the main focus when thinking about EQ. Vocal equalization is always important but it can especially so for podcasters. Many podcasters end up with some deficiencies in their audio usually due to inexpensive mics and non-sound treated rooms. EQ is one of the ways we can overcome those limitations with software.
Graphic Equalizers

You don’t see many podcaster with an analog EQ like this anymore. Now, powerful EQ is built into most software.
Graphic equalizers are great for podcasters because the learning curve is pretty short for basic use. These plug-ins (just like their analog counterparts) divide the frequencies into bands. The number of bands varies.
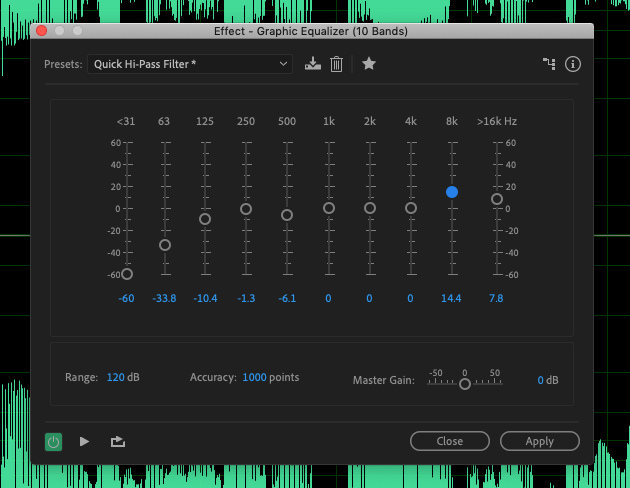
The ten band graphic EQ in Adobe Audition
Audacity, a program massively popular with podcasters, has a built-in graphic EQ with 31 bands while Adobe Audition allows you to choose from 10, 20, or 30 bands. GarageBand, as usual, is a little different. Instead of a conventional graphic equalizer, they offer a three band low, mid, high control. However, this pairs nicely with the more advanced Visual EQ which is a unique hybrid graphic/parametric EQ.

Apple’s GarageBand has some powerful EQ tools for podcasters.
So, how many bands does a podcaster need?
I may be in the minority amongst my colleagues, but I say, the fewer, the better. In other words, when using a graphic EQ, I like to work with the one with the least number of bands possible that will still enable me to create the sound I am looking for. If I can make the 3-band EQ in GarageBand work for my needs, there is no purpose of having 30 bands to mess with. It only increases the chances of making things worse. However, due to the unique needs of budget-minded podcasters finer control is often needed. This call for more bands or, our next topic.
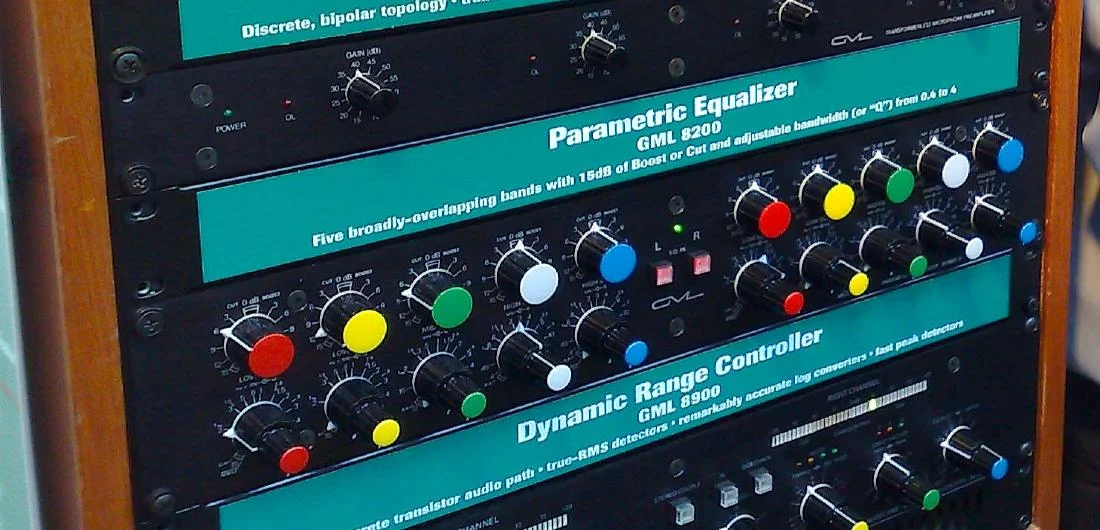
Parametric Equalizers used to be expensive rack-mounted units. Now, they are built into software. This is great news for podcasters,
Parametric EQs
Parametric EQs can seem a bit overwhelming to new users. However, they aren't all that complicated. The interface is not as graphically intuitive as the graphic EQ where things are as simple as turning the desired band up or down.
Basically, parametric equalizer's allow you to select the exact frequency you wish to adjust. Instead of a pre-selected band, you can control a frequency or range of frequencies of your choice. This allows for more precise adjustments.
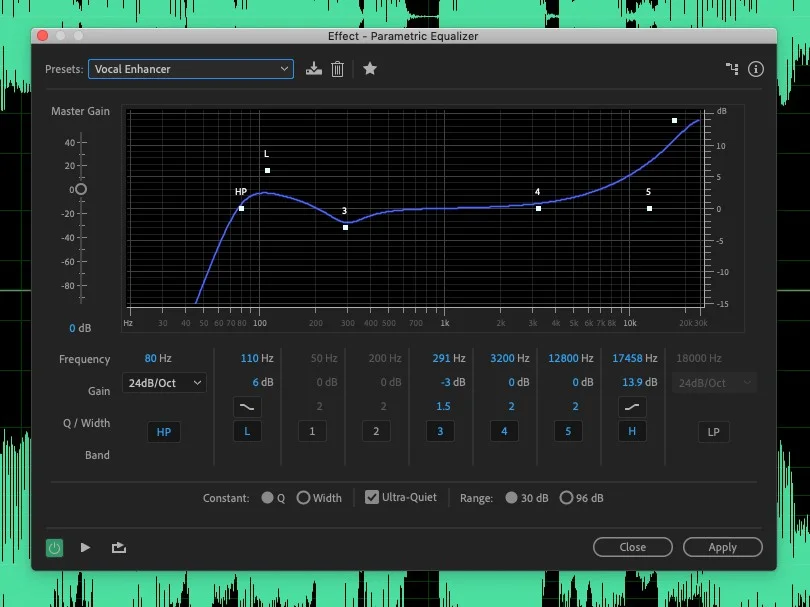
The parametric EQ in Adobe Audition. With a little practice, this can be a great tool for podcasters.
This can be a huge help to those producing a podcast. When you are trying to make up for the echo in your recording space, reduce the sibilance in your voice, or just trying to make a cheap mic sound better, precise adjustments can be lifesavers.
I’m a Podcaster, Which One Should I Use?
For the most part, for the work we are doing on improving podcast quality, you can use graphic, parametric, or any of the hybrids in most recording and editing software. Honestly, for podcasting, I have a graphic equalizer set up as a preset that I use for nearly every episode. That helps me sound the same from episode to episode. For voiceover work, I tend to rely on the parametric EQ. I have a preset for that as well for delivering that studio-grade sound.
I also use the parametric when I need to remove something from the file. For instance, if I cut a track and there a slight pop from one of my p's, I often use the parametric EQ to cut out the frequency of that pop while leaving the rest of the sound intact. That saves me from having to recut the track.
For podcasting, it really comes down to personal preference and depends a lot on what software package you are using.
Up or Down?
When using an equalizer, it is tempting to begin by increasing the frequencies you want more of. A better approach would be to start by decreasing the frequencies you want less of. Boosting frequencies may be necessary or helpful at some point but begin by cutting.
A Little Goes a Long Way
I notice when people get started with equalization there is a tendency to overdo it. As your ears get more experience, you will realize that a reduction or boost of just a couple of dB can make a drastic difference. Unless you are cutting out a frequency entirely, try a little bit at a time.
So, now that you know your way around the EQ, it is time to start cutting and boosting. In my next post, we will look at what is included in the different frequency ranges and how you can adjust settings to fix common problems that many podcasters face and enhance the sound of your voice and podcast.

Podcast Intros: Catching Your Listeners' Attention
If you want a professional sounding podcast, you need a professional sounding podcast intro. However, you don't necessarily need to hire a pro to have a great intro. In this post, I will discuss the elements of a great intro and how to go about either producing your own intro or hiring someone else to do it for you.

If you want a professional sounding podcast, you need a professional sounding podcast intro. Full disclosure: A large part of my business involves voicing and producing podcast intros and outros. However, you don't necessarily need to hire a pro to have a great intro. In this post, I will discuss the elements of a great intro and how to go about either producing your own intro or hiring someone else to do it for you.
Often, when people hire me to produce a podcast intro, their first question is, "What should be included in my intro?" Fortunately, I love working with podcasters, so I am always willing to take the time to walk through the podcast intro script this with my clients. Some voice artists aren't so patient and just want your completed script. Also, if you decide to do it yourself, you will need to develop and write your own podcast intro script and consider what other elements should be in your intro.
What is the Purpose of the Podcast Intro?

Your podcast intro has one purpose: to keep people listening.
Your podcast intro has one purpose: to keep people listening. Now truly that is two purposes in one. Your podcast intro needs to take into account both new listeners and people who are already faithful listeners.
First of all, your podcast intro needs to convince new listeners to keeps listening. Say someone stumbles upon your podcast or one of their friends invites them to listen. Just because they hit play doesn't mean they are going to keep listening. What they hear in the first few seconds may determine whether or not they continue listening.
But what about people who are already listeners? If people already listen to and like your podcast, they are more likely to listen on after the intro. However, you also have a chance to keep them engaged by giving them a little peek into what is in store in the latest episode.
Given that your podcast intro is designed for two different audiences, I like to break the intro down into two parts:
Podcast Intro Part One - Information about the podcast that stays the same from episode to episode.
Podcast Intro Part Two - Information about the specific episode.
Just because these are numbers, one and two doesn't mean they need to go in this order. In fact, they don't need to be that specifically segregated. But let's look at them to see the information we need to include.
Podcast Intro Part One - Information about the Podcast.

I will work with you to create a podcast intro that you will love. You can provide the script. Or, if you need help, you can purchase script writing separately.
With your input, we will choose the right vocal delivery, music, effects, and other building blocks for your intro. I will then voice and produce the intro, finishing it off with professional audio mastering. It will sound like you had it produced at a professional studio – because we are a professional studio.
Once it is done, I will send it to you for review. 90% of the time, clients are happy with the first delivery. However, I want you to love your intro, so I include two rounds of revisions so we can get it perfect.
If you need an outro, you can add that to any intro order.
Part one can be, in theory, the same every episode from the very first to episode 9,387. You may decide to do some refreshing along the way, but this part can remain fixed.
Here are some of the elements of Part One:
The name of the podcast.
The name and other information about the host(s).
Purpose, tagline, or description of the podcast.
So, if I were to write a part one for my podcast, it might go like this:
Welcome to the Pro Voice Guy Podcast, the podcast about podcasts. Here is your host, Voice-over pro, Will Rice.
That is not actually how my podcast intro is written. I voice my intro, and I don't like announcing myself, so my name goes in part two of my intro.
So, part one of my actual intro goes like this:
Pro Voice Guy Podcast, the podcast about podcasts, plus a few extras about audio, social media, marketing, tech, and other stuff.
Take a listen:
Stay with me. We will put this all together soon.
Podcast Intro Part Two - Information about the Specific Episode
To draw in new listeners and to keep repeat listeners engaged, information about the specific episode is an essential part of your intro. Even for some of my favorite podcasts, if the intro doesn't do a great job of selling me on the episode, I might go on to the next episode (if it is already available) or listen to another podcast on my list. If it is a new podcast I am trying out, there are times when I don't make it past the intro.
Here are some elements of Part Two:
Episode name (If you name your episodes)
Episode number (And season if you have seasons)
An introduction to or teaser of the topic of the episode
Helpful context (Location information, recording date, etc.)
Any other essential information (sponsor, disclaimers, etc.)
So, part 2 of my intro might go like this:
Welcome to Episode 11 of the Pro Voice Guy Podcast. Live from Pro Voice Guy Studios in San Antonio, Texas, I'm Will Rice. Today we are going to be talking about using your recording and editing software to make your podcast sound great.
You start to see how flexible this is. I don't give my name in part one so it appears in part two. I also don't give titles to my episodes and I don't have any sponsors. I do give the name of the city where I am based.
Why Two Parts?
Since I have already jumbled up parts one and two, why did I bother to split the intro into two parts? Because you have another option to consider: pre-produced vs. live. Those terms are a little confusing because very few podcasters actually air episodes live. However, many podcasters use pre-produced intros. There are four main types of pre-produced intros.
Self-Voiced and Produced - The podcast host cuts the vocal tracks and produces (add music and effects, then mixes and masters) the standard intro used at the beginning of each episode.
Self-Voiced and Professionally Produced - The podcast host records the vocals and hires a professional producer to add music and effects and mix and master the intro used at the beginning of each episode.
Professionally Voiced and Self-Produced - The host pays for a professional voice over and does the production themselves.
Professionally Voiced and Produced - The host pays someone to take care of the entire intro.
This is where parts one and two come into play. If you are going to the work and/or expense to create a pre-produced intro, you may not want to have it re-done for every episode. Now some podcasts do this. Every week, they have a professional voice talent introducing the show, the hosts, the episode - including everything from parts one and two in a fully-produced podcast intro. As someone who makes money producing these, I love those. It means steady work. However, this is where most podcasters decide to divide it up.
For instance, I shared above part one of my intro. Interestingly enough, I do part two first, and I do it live. Again, it is not actually live, but I record that part while I am recording the rest of my podcast. While editing the episode, I drop the pre-recorded intro in right after I say all the words in part two. So, putting it together, it goes like this:
"Welcome to Episode 11 of the Pro Voice Guy Podcast. Live from Pro Voice Guy Studios in San Antonio, Texas, I'm Will Rice. Today we are going to be talking about using your recording and editing software to make your podcast sound great."
Pre-produced intro:
Pro Voice Guy Podcast, the podcast about podcasts, plus tech, social media, and other stuff.
Here is a clip from the beginning of one of my episodes.
This is the long version of what goes into a podcast intro, but I hope it helps. If you are simply reading your intro at the beginning of your episodes, you will have the most flexibility. However, if you are going to have a professional intro produced, it is good to think about how you will deal with each of the elements in part one and two.
I Am Happy to Help
If you decide you want to hire a pro to voice or produce your intro, I would be glad to help. As I hope you can tell from this post, I am more than voice talent . I am always happy to help figure out how to put the whole thing together so that your podcast sounds great.
I will work with you to create a podcast intro that you will love. You can provide the script. Or, if you need help, you can purchase script writing separately.
With your input, we will choose the right vocal delivery, music, effects, and other building blocks for your intro. I will then voice and produce the intro, finishing it off with professional audio mastering. It will sound like you had it produced at a professional studio – because we are a professional studio.
Once it is done, I will send it to you for review. 90% of the time, clients are happy with the first delivery. However, I want you to love your intro, so I include two rounds of revisions so we can get it perfect.
If you need an outro, you can add that to any intro order.
Podcasting Tips: Making Your Podcast Sound Better with Normalization and Limiting
Do you want your podcast to sound better? Why let sound quality get in the way of your excellent content?
In my last post, I told you about using audio compression to keep your levels more consistent across your podcast. This time, we will cover two more important effects that can improve the overall sound of your episodes: normalization and limiting.
Still to come in the series I will take a look at equalization (EQ), noise reduction and putting it all together.

Normalization
Let me start by saying that normalization is pretty straightforward – except that it is not. In the world of audio, the term normalization may mean two things: peak normalization or loudness normalization. Loudness normalization is an important topic, but we are going to need to save that for another post. Peak normalization is what we are going to focus on here.
What is Peak Normalization?
In my last post, I wrote about compression. Compression is reducing the dynamic range between your loudest sounds and quietest sounds. Peak normalization, on the other hand, adjusts the gain across the entire recording. It is pretty straightforward. Peak normalization looks for the highest signal level (the peak) in the recording and adjusts the overall gain so that that the highest level is set to a level you determine.
Here is a file recorded in Garage Band with no processing at all.

Making your podcast sound better - audio in GarageBand with no processing.
Here is the same file with compression added.
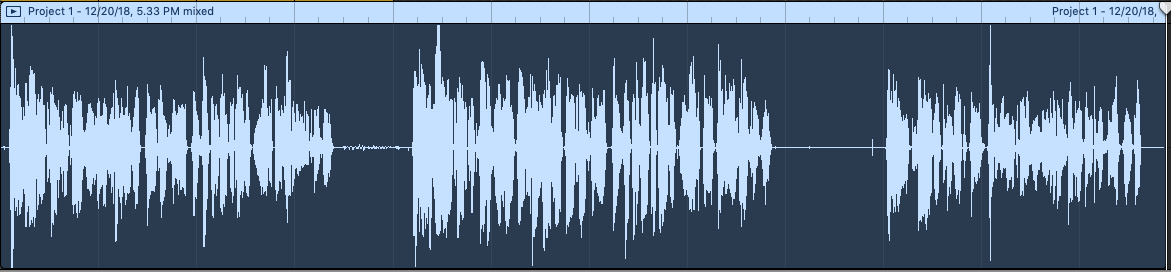
Now, here is the same file normalized.

Normalization applied to compressed file in GarageBand
Note: Garage band makes this process pretty simple, but it is a little tricky to figure out. In Garage Band, adding compression doesn't impact the shape of the waveform until you export the file. Normalization can only be applied during export.
Most of the time, normalization is used to increase the gain to its highest possible level without going over 0dB which can cause clipping. Many audio pros suggest setting this at .1 dB. I set mine at .25 dB. That means the very highest peak in my recording will not cross .25 dB.
Peak normalization is so simple, you can do it manually. Just increase the gain across the entire track until the peaks are where you want them. However, using built-in normalization in your audio workstation is a much safer bet. If you do it manually, you need to be really sure you haven't accidentally set your gain, so any peaks are over 0dB.
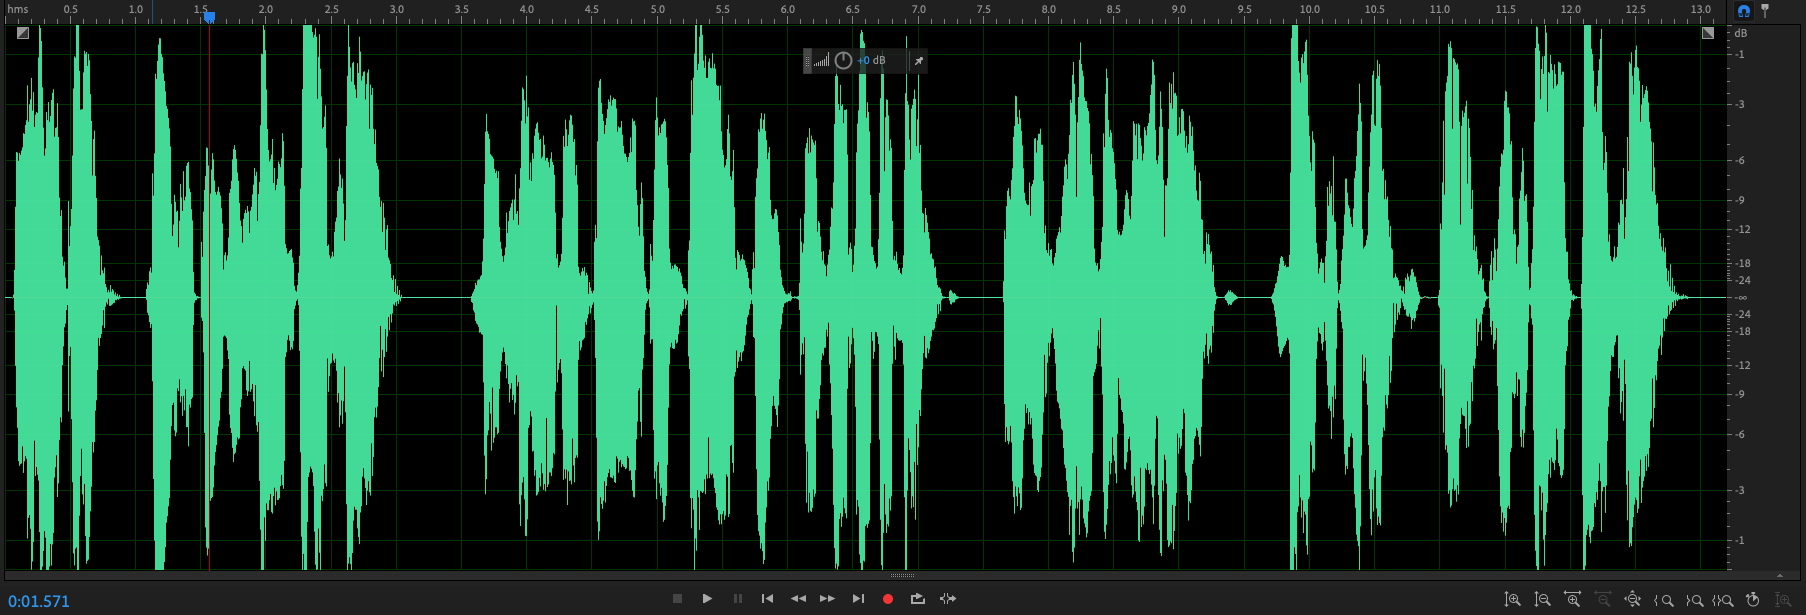
peaks exceeding 0 DB in Adobe Audition
What happens if you go over 0dB? Sometimes you get lucky, and nothing happens. Technically, anything over 0dB is considered clipping. Usually, a little clipping here and there doesn't cause a huge problem. However, too much clipping can create distortion. Your best bet, unless you are an audio pro simply don't let anything go over 0dB. Using peak normalization is an easy way to ensure never crossing that threshold.
Limiting
I held a long debate with myself about including limiting here. Limiting can be a very helpful tool, but it can also be disastrous if used wrong. Limiting is not a substitute for compression or normalization.
Limiting is a type of compressor. It is just a very unforgiving compressor. Whereas a compressor smoothly reduces the gain of the signal over a specific threshold dB using a predetermined ratio of reduction, a limiter basically crushes anything above that level.
Using a limiter the wrong way can lead to some very strange results. Instead of a gentle reduction of the peaks, the limiter will not allow any signal to cross the threshold. When used incorrectly, the result can be the same as the distortion caused by clipping. However, limiting has some practical applications.
Here is where it may be useful. There may be times when, even after compressing a track, there are a few stray peaks that are way above the average for the recording. If you normalize the file using peak normalization, you may find the overall level of the recording seems very low. The reason is that it is using those stray peaks as the maximum level. Since normalization is setting the level of the entire track based on the highest peaks, those strays are hitting the threshold and not allowing the rest of the gain to be increased.
Here is a recording in Adobe Audition that has some stray peaks.
Some stray peaks in this file may call for a limiter.
Here is what happens when it is normalized.

Normalization has no effect when peaks are already at the set limit.
If you look closely, you will see that nothing happened. Those strays were counted as the peaks and couldn’t be raised any further without exceeding the threshold. Using a limiter can lower the level of those stray peaks so that the overall gain can be raised to the pre-selected level.
Here is a hard limiter applied at -3 dB which appears to be the maximum gain if you eliminate the stray peaks.

A hard limiter applied at -3Db
Now, let’s see what that looks like with normalization.

Normalization after application of a limiter.
Let’s see those side by side. On the left, the file normalized before adding a limiter. On the right, the file normalized after adding the limiter.

Use Your Ears!
The most essential tool in your toolkit when working with compression, normalization, and limiting is your ears. Whenever applying effects of any sort, be sure to listen back carefully. If something sounds wrong, something is wrong. Go back and remove the effects one by one until the problem goes away and then try again with different settings until everything sounds right. It takes some trial and error, but once you get the hang of it, it won't take long to get your audio sounding great.
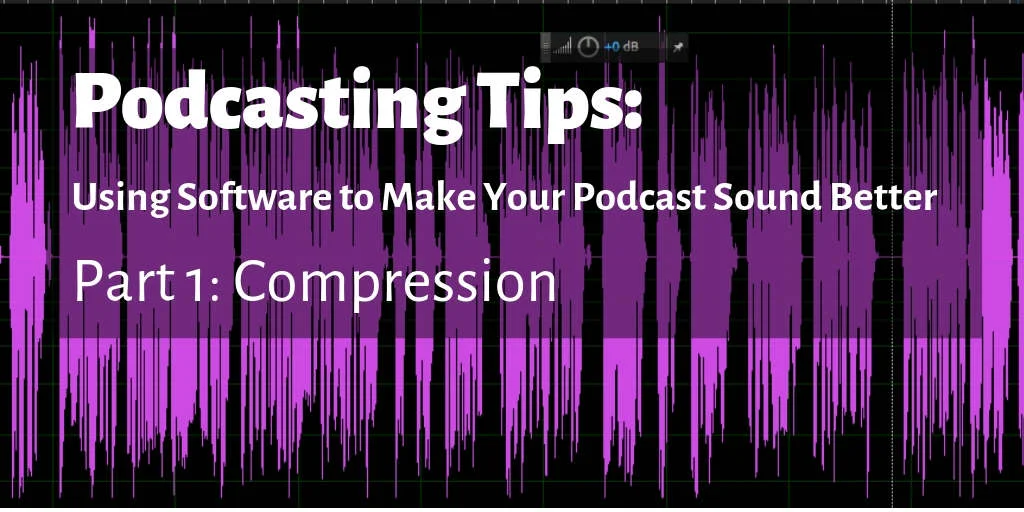
Podcasting Tips: Using Software to Make Your Podcast Sound Better - Part 1
Ready for some podcasting tips? Ready to make your podcast sound great?In my last post, I wrote about some of the first steps to take when you are ready to make your podcast sound more like the professional podcasts you listen to.We started with the two most essential factors in audio quality: the space you are recording in and your microphone. Now, we will move on to the software.
Ready for some podcasting tips? Ready to make your podcast sound great?
In my last post, I wrote about some of the first steps to take when you are ready to make your podcast sound more like the professional podcasts you listen to.
We started with the two most essential factors in audio quality: the space you are recording in and your microphone. Now, we will move on to the software.
Software can only do so much to make your podcast sound better.
As I mentioned in my last post, software does its best work when you are starting with a good, clean audio signal. That is why starting with the initial recording is so important. Any noise, reverberation, or other room sounds will end up in your digital recording. Any deficiencies in your microphone will also show up in the recording.
While software can help to mitigate audio issues, there is only so much it can do. In some situations, efforts to reduce noise and echo tend to make the whole thing sound worse.
For this series, I am going to assume that you already know how to record sound and do some basic editing in your software of choice. It won't matter which software you are using because these concepts are the same no matter which platform you choose. However, I will use examples from some of the more popular options: Audacity, Adobe Audition, and Garage Band.
Compression, limiting, normalization, and equalization
In this series, we will look at three aspects of audio production: compression, limiting, normalization, and equalization. Used together and correctly, these can make a considerable improvement in the sound of your podcast. Today, we will examine compression.
Compression - In the audio world, compression is the process of reducing the dynamic range of an audio file. In more straightforward English, it reduces the difference between the loudest sounds and the softest sounds in your recording. It does this by lowering the level of the loudest sounds and boosting the level of the quietest sounds. If you have ever listened to a recording that caused you to keep your hand on the volume to turn it up when you couldn't hear and turn it down when it was too loud, you heard a recording that needed compression.
Two roles of compression
In a podcast, compression has two critical roles. The most important task is keeping the volume consistent throughout the episode. Listeners don't want to have to pull their phone out of their pocket to change the volume constantly through your show. The second role is crucial if you use music in your podcast. Shrinking the dynamic range of your vocal audio makes it easier to mix your vocals with music without having to continually adjust the music.
Let's listen to an example.
I recorded that in the built-in Garage Band app and turned off the built-in compression and reverb. Let's see what this looks like. We will take a look in Adobe Audition's audio editor.

Sample podcast audio recorded on an iPhone 7+ using Garage Band with no processessing.
You can see the significant differences in the dynamic range. Next, I will put some compression on it. If you only remember one thing about compression, remember not to use too much. In layman's terms, it will make your podcast sound bad.
When applying compression, in most software programs you will find some presets. If you don't want to learn about how compression works, you may find one that does the trick. But, just for fun, let's look at how it works.
Threshold, Ratio, Attack, and Release.
There are four main factors in compression: threshold, ratio, attack, and release.
Threshold & Ratio
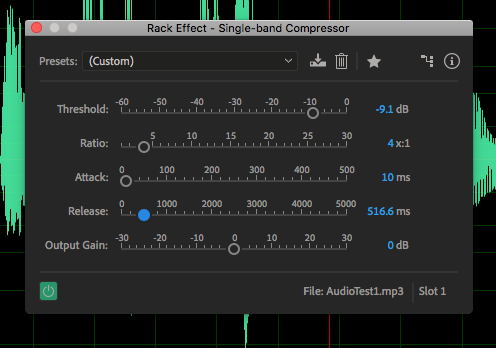
The controls for a single band compressor in Adobe Audition
Threshold is the level at which the compressor starts doing its job. In other words, how loud does the sound need to get before it needs to be reduced?
Ratio is about how much we are going to lower the level once it surpasses the threshold. This starts to get into math, so I am going to attempt to simplify. The higher the ratio, the more you will be compressing (or reducing) the sounds that are louder than the threshold you set. A 1:1 ratio wouldn't have any impact. A 20:1 ratio would act more like a limiter not allowing much of anything to go past the threshold.
If you want to get a good sound out of compression, you are going to need to experiment with the threshold and ratio. Back in the day, when I learned, compressors were big, rack-mounted components with knobs. I found it easier to experiment on those, but the new digital plug-ins give you much more power and flexibility.
Attack & Release
Attack and release are a lot simpler to understand but just as important and just as tricky to master. Attack refers to how fast the compressor kicks in when the signal crosses the threshold. Release is just the opposite. How fast does the compressor release the signal after it goes back below the threshold? The fundamental rule of thumb is that you want this to be as fast as possible without causing any distortion. Again it is about experimentation and careful listening. Let's look again at our audio clip now with some compression.
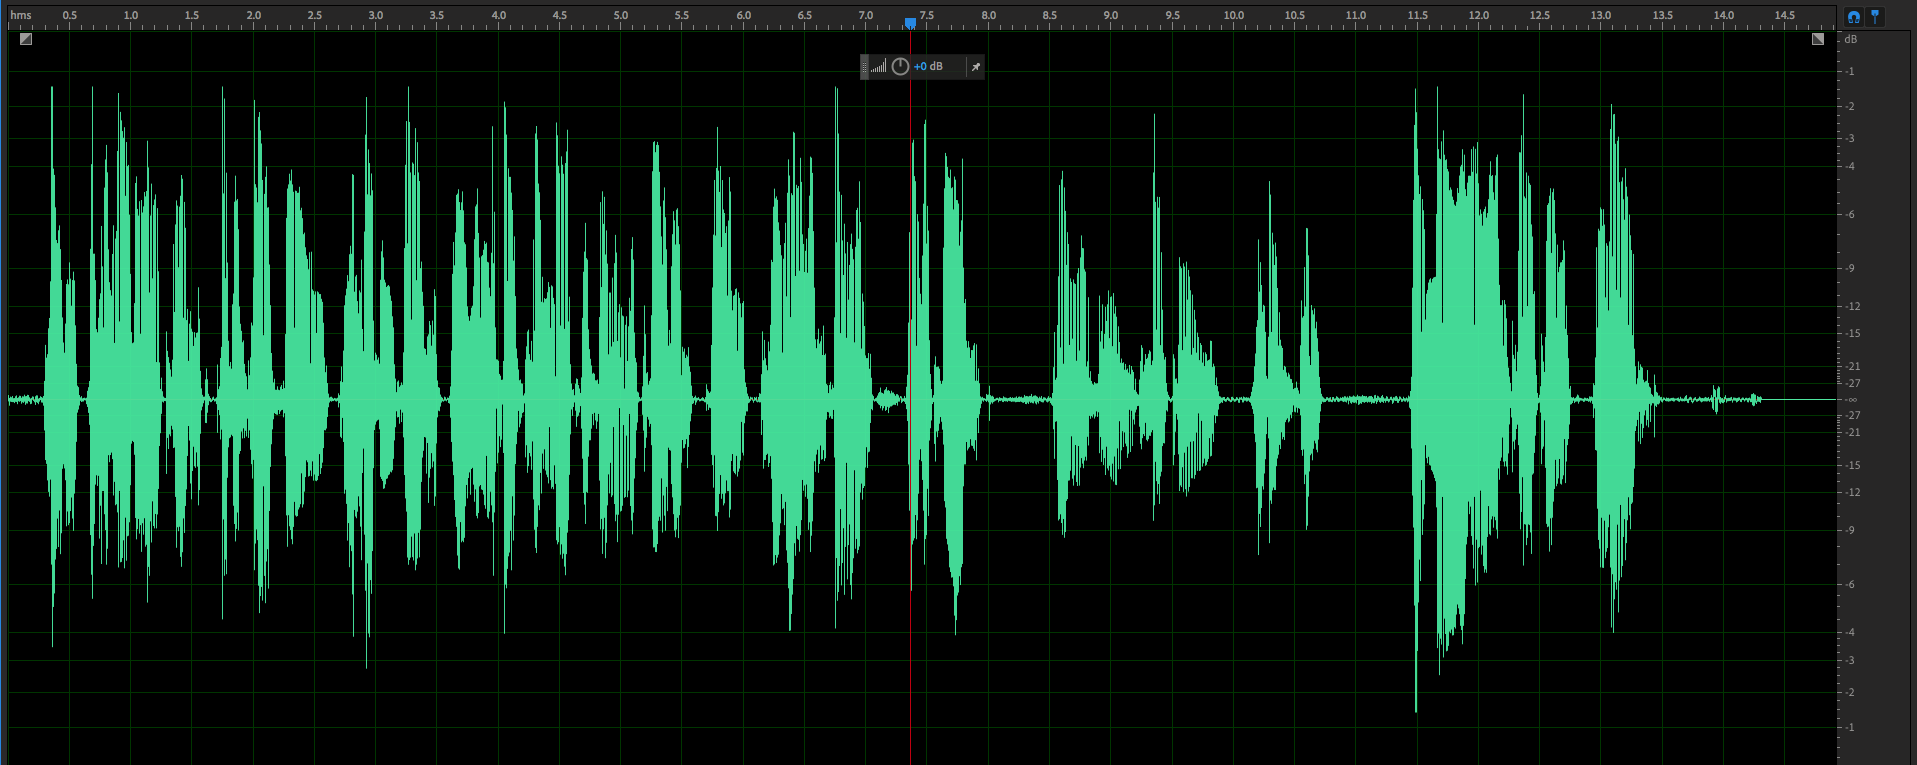
The same sample, now with compression applied.
See how those levels are more consistent across the track? You will also see (and hear in a moment) how that background noise, breaths, and other sounds have also been increased. We Will deal with that in another post.
Let's listen.
Now, as an example, I am going to put way too much compression on the track.
Take a look.

A track with far too much compression.
Now take a listen.
The toughest thing about compression is that you need to trust your ears. This is where listening to other podcasts helps. Have a listen to a couple of podcasts that sound really good to your ears. Then, start experimenting with compression settings that make your show sound better.
And, this is just one step. In the next post, I will examine limiting and normalization. Once we have the compression right, these will help us get our levels set correctly.

Podcast Tips: Making Your Podcast Sound Better
Looking for some podcast tips? Want to make your podcast sound better? Keep reading.
So, you have started a podcast, or you are getting ready to make the leap. But, when you listen to your recordings, they don't sound the same as some great podcasts you listen to. What can you do to improve your sound quality? What can you do to make your podcast to sound as good as professionally produced podcasts?
Good news! Podcasting is the great equalizer when it comes to quality. You don't need access to a professional recording studio or a team of engineers to compete with the pros. There are some inexpensive, downright cheap, and free methods you can use to up your sound game.
Start With Your Space
The best place to start for great sounding audio is the space you are recording in. First of all, you need to get away from noise. Background noise can be distracting. Even if you manage to filter it out with noise reduction or noise gates, it still impacts the quality of your sound.
(Don’t worry if “noise reduction” or “noise gates” are new to you. I will cover them in the next post.)
Noise
Noise comes from more sources than you can imagine.

Leaf blowers DO NOT help your podcast sound better.
People talking in your home (or next door, upstairs, or outside.)
Heaters and air conditioners (both the sound of air coming out of vents and the mechanical noise.)
Plumbing (A toilet flush makes a lot of sound!)
Lawnmowers and leaf blowers
Traffic
Bugs (really, cicadas are not my friend.)
Acoustics

The right acoustics can help make your podcast sound better.
Noise is only one issue you need to deal with. The general acoustics of the room you are in play a critical role in your sound. If you are serious about your podcast, you could invest in a complete sound conditioning of your room. This would take care of muffling outside noise and improving the acoustic. But, if you are on a budget or are not able to make any modifications to your space, you can still get professional sounding audio.
The biggest acoustical issue most podcasters deal with is echo. As I listen to some podcasts, I can picture the room. Often, it is a spare room with little in it. Sometimes it sounds like it doesn't even have carpeting. This creates a hollow, echoey sound. Many listeners wouldn't recognize it as hollow or echoey, they just notice that it doesn't sound right and it doesn't sound like some other great podcasts. If the echo is too much, it even becomes difficult to make out the words being spoken. Combine this with a less than adequate microphone, it sounds less like a podcast and more like talking to someone on a bad speakerphone.
More Stuff = Less Echo

Believe it or not, recording in the closet can help in making your podcast sound better.
To make improvements, the most straightforward technique is to get more stuff in the room, especially on the flat surfaces. Acoustic panels are a great way to go, but you can still improve sound with materials you have lying around the house. Hang blankets on walls, put more furniture in the room, lay down a carpet. Anything you can do to keep that sound from bouncing around will reduce the echo and improve the sound quality.
If that isn’t impractical, one solution that won't cost a dime is: go in the closet. There have been several times in my career that I have found myself cutting vocals in a closet, and the more clothes, the better. A closet full of clothes muffles the external noise and eliminates echoes. The acoustics of some closets are as good as some professional sound recording booths.
Be creative. I know one voice-over artist who created a sound booth by hanging some heavy-duty moving blankets creating a sort of three-sided tent around her. I can't say it looked great, but the sound improvement was impressive.
Check Your Microphone
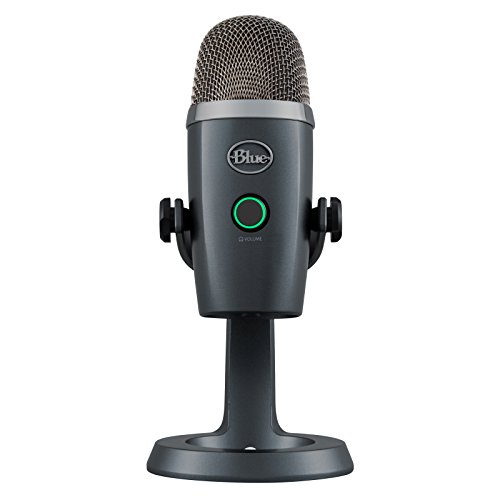
It is smart to start with your space. Even the best microphones won't produce great sound in a room with poor acoustics. In fact, some types of higher-end microphones will actually make acoustical problems worse by picking up more of the noise and room ambiance. Once you get your room noise and acoustics under control, the next place to look for sound improvement is your microphone.
Fortunately, I have already written an entire post (and produced a podcast episode) on microphones. On the blog and on the podcast, I even offer sound samples from the three microphones I recommend. All of the mics I reviewed were USB. These are mics that plug directly into your computer.
For some variety, I am going to offer three options here: a true budget option, an upgraded budget option, an entry-level professional option, and an "I'm all in" option
Budget Option
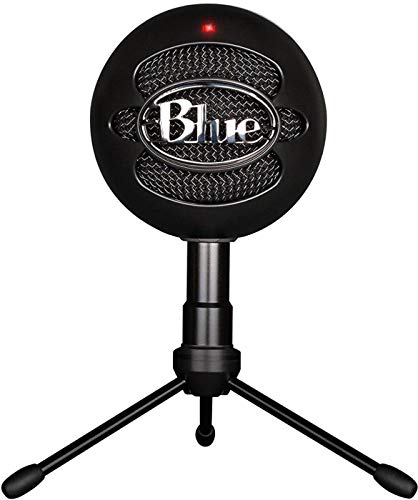
Blue Snowball iCE Condenser Microphone, Cardioid - Black
As I wrote in my post on microphones:
I still can't believe that you can pick one of these up for around $50. I also see them at pawn shops for half that. While it doesn't have quite the depth and clarity of the Blue Yeti, honestly, most people will never know the difference.
It lacks the multiple pickup patterns of the Yeti as well as the 3.5mm headphone jack. However, if you don't need those features, this is a great mic. If you are just starting your own podcast, this is a great place to start.
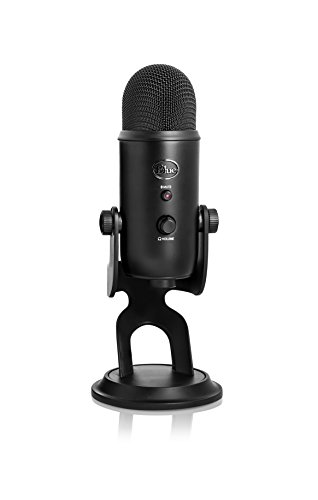
Upgrade (But Still on a Budget)
Blue Yeti USB Microphone - Blackout
From my microphones post:
As someone who had the privilege of working on some iconic microphones (including the industry standard ElectroVoice RE20), I still amazed by the sound quality of this offering from Blue. Some audiophile will likely leave a comment explaining why these are no good and I should throw mine out, but I use this thing day in and day out and it always produces surprisingly good results.
The Yeti is actually three microphones in one. With three onboard condenser capsules, you can select the pickup pattern. That means you can set it to only record the sound coming from directly in front (great for one voice), the sound coming from the front and back (great for interviews), or the sound for all directions (great for recording music or multiple voices.)
Entry-Level Professional
Rode Procaster Broadcast Dynamic Vocal Microphone
When it comes to professional-level microphones, audio experts have feuded forever on the topic. You can get endless advice but it really comes down to the unique tone of your voice and the equipment you are working with.
There is also much discussion to be had about dynamic vs. condenser microphones. That is beyond the scope of this post, but this is a dynamic microphones.
Despite all that, for under $250, this is an impressive microphone. But with a professional grade microphone with its XLR connection, you are going to need a USB Audio Interface.
Focusrite Scarlett Solo (2nd Gen) USB Audio Interface
For a podcast, this is all you really need to connect your microphone to your computer. It’s high-end enough to be virtually noise-free and has just enough features for a podcaster. The only reason to spend more than the $110 this one costs, would be if you plan on having multiple microphones for co-hosts or guests.
“I’m All In”

Shure SM7B Vocal Dynamic Microphone, Cardioid
Okay, at this point, I am just picking one of many options. Though, at under $400, this is a pretty amazing microphone. I sat behind a similar model for years at a rock radio station where I worked. Again, results depend on your unique vocals and other equipment.
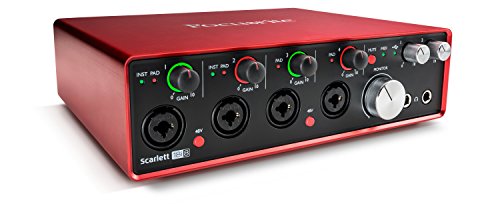
Focusrite Scarlett 2i4 (2nd Gen) USB Audio Interface
Well, since we are buying $400 microphones, perhaps we will have some guests in the studio. This upgrade has four mic-preamps – which means you and three guests can plug in and sound great.
Leverage Your Software
Once you have your room acoustics under control and have found a decent microphone, you can let your software assist you the rest of the way. Software can also help if you haven't been able to deal with the sound of the room or microphone quality, but software does its best work when you are starting with a clean, high-quality signal.
I will spend the entirety of my next post discussing how software can make you sound better!

Promoting a Podcast: Finding Your Listeners
Promoting a podcast? That's often the last thing people are thinking about when they are hit with the inspiration to start sharing their ideas via audio on the web. I have been a fan of the "Build it, and they will come," strategy ever since I saw Field of Dreams. Unfortunately, it rarely works.

Promoting a podcast? That's often the last thing people are thinking about when they are hit with the inspiration to start sharing their ideas via audio on the web. I have been a fan of the "Build it, and they will come," strategy ever since I saw Field of Dreams. Unfortunately, it rarely works.
Think about it, the latest film in the Jurassic Park series, The Fallen Kingdom had a lot going for it. Big stars, a known franchise, killer CGI, and yet, Universal spent around $185 million to promote it. So, my little podcast, without an established franchise, or Chris Pratt, is going to need a little help gaining traction.
Unfortunately, I also don't have 185 million dollars. Most of us don't. Most podcasters have budgeted somewhere in the neighborhood of $0 to promote their podcast. That is okay.
I can't guarantee you are going to make it to the top of the charts or start pulling in six-figures from your podcast but, I am going to share some tips for getting the word out.
Start Early when Promoting a Podcast
If you haven't launched your podcast yet, now is the time to start promoting.
If you haven't launched your podcast yet, now is the time to start promoting. Just don't start too early. What I mean by that is, be sure you are going to do it. There is no data to back this up, but I want to guess that most podcasts die before they ever launch. So, don't waste your energy promoting until you are sure you will have something to promote.
Launch Your Podcast with Multiple Episodes

a list of episodes from the Pro Voice Guy Podcast
This can be a hard one. I know, for me, once I had my first episode done, I wanted to set it free in the wild and see how it would do. However, if you're going to get people hooked, give them more than one to listen to right from the start. This will also help with your listener count. If you talk 50 people into listening to your podcast and you have one episode, that gives you a listen count of 50. If you have five episodes, and your friends decide to keep listening after the first one, that is 250.
How Many Episodes?
That might depend on how time-sensitive your podcast is. If you are starting a sports podcast that covers the weekly games, you don't want to launch with five episodes since four would already be dated. But you could put together a season preview and launch with that and week one.
If your podcast does not have a shelf-life, you could launch with three, five, or even more. Think about it, services like Netflix launch an entire season of a new show all at once.
Tell Your Friends, Family, Coworkers, Neighbors, and other Random People You Know

When promoting a podcast, don’t forget to tell your friends.
This seems obvious, but many podcasters fail to do this. The people most likely to listen to your podcast are people you already know. No this may be a harder sell if you have a really niche podcast (like this one). However, your closest friends will likely listen anyway. This will give you some momentum. Building up some initial downloads and listens will provide you a mental boost and may even get you featured on the charts.
In person is always best, but you may be able to reach more people via email. Just keep it personal. Don’t copy and paste a bunch of addresses into the to: or cc: field. Send each one individually and use your friends’ names. If you have a ton of friends, you could use a service like MailChimp. Just be sure to take advantage of the automated personalization features.
Here is a sample email you might send. This one falls under the “start early” concept. Send out an email like this a couple of weeks before you are ready to launch.
Friend,
I am starting a podcast! Maybe you are wondering, "What is a podcast?" It is a short audio program that people can listen to on their computer, mobile device, or even in their car.
Mine is about...[description of your podcast]
I am wondering if you could do me a favor and give it a listen. I am hoping you might enjoy it. Even if it isn't your thing, just listening to one episode will help me out. Podcasts get more attention when people are listening to them. By listening, you might help someone else find the show.
The show launches in two weeks. Don't worry, I won't spam you about this, but I will send you an email when it is ready with a link so you can give it a try. Maybe you might even consider sharing it with someone else who might be interested.
Thanks in advance!
Me
Ask Those Friends to Tell Their Friends
Of the efforts and methods you use when promoting a podcast, word of mouth will always be king. Don't be afraid to ask your friends to help spread the word. Here is a sample email you could send out to your friends when you finally launch.
Friend,
[Name of your podcast] is live! I have already posted five episodes, and I wonder if you might take a few minutes to listen to an episode (or more if you want.) Even if it isn't your thing, your listen will improve my ratings and help others find the show.
You can listen here. [link]
If you have any friends who might be interested, I would be grateful if you would forward this email along to them.
Thanks in advance for your help!
Me
Leverage Social Media to Promote a Podcast
promoting the Pro Voice Guy podcast on social media
Everybody is going to tell you to use social media to promote your podcast. I agree, but it is more complicated than that. The effectiveness of your social media impact is going to depend on your current social media presence. Let me make this simple. If you have five Twitter followers, sharing about your podcast is not going to have a significant impact.
If you are serious about using social media to promote your podcast, you are going to need to do some work to grow your audience and follow best practices. That could be a whole post on its own. Fortunately, there are some other folks online already writing about this.
Andrea offers some great insight especially in her free Social Media for Podcasts Roadmaps. If you are serious about this, she also offers paid consulting.
Jeff Bulas' blog is a great place to start when learning about all the ins and out of digital marketing and personal branding.
PastorWill.net – I write another blog mostly dedicated to church communications but if you search “social media” you will find some tips and advice on growing and connecting with your social media audience.
Hang out Where Your Niche Hangs Out

when promoting a podcast, hang out where your potential listeners hang out.
I originally wrote this section solely on social media. But as I wrote it, it occurred to me that this is about “social” period. Ask yourself, where do people who might like my podcast hang out – online and off?
If your podcast is about a local sports team, think about all the possibilities. There might be a Twitter hashtag that gets used to talk about the team, especially on game days. There may be one or more Facebook groups. There may be a website where people can comment about the latest news. Or, still social, but not online, there may be a local sports bar where everyone gathers to watch the game. Any of these places are great venues to engage with people who share the interest.
It might be tempting to use these places just to post about your podcast, but that isn't going to play in a Facebook group, or in a bar. You will need to engage, join conversations, and get to know people before you let them know you also have a podcast they might want to listen to.
Spend Some Money to Promote a Podcast
I saved this for last because most podcasters I talk to have about $0 budgeted for their podcast and that covers equipment, hosting fees, and snacks. But if you want to go for the gold and can find a way to fund it, a little money can go a long way. Here are some of the options you have to spread the word a little faster.
· Advertise on related podcasts.
· Purchase some targeted ads with Google Ads.
· Pay for some boosted posts on Facebook.
· Invest in Promoted Tweets on Twitter.
It doesn't take a lot of cash to gain a little momentum using these options. However, consider them as a way to supplement all the free stuff. Engaging your friends as promoters is free and will always be the most powerful way to find more listeners.
It just wouldn’t be right to end this post without inviting you to listen to my podcast! You can check it out here.
If you are looking for a professional intro for your podcast, I can help. Check out my professionally voiced and produced podcast intros starting at $10.
If you want to check out some of the equipment I use in my own studio or write about on this blog, you can read more here.
Podcast Hosts: The Best of the Best - Starting Your Own Podcast
When starting your own podcast, one of the most important things to consider is where it will live. I have spent the last couple of months getting to know as many podcast hosting sites as I could. It took some time to get a feel for what sets them apart from each other. There are so many different pricing models, feature sets, and plans that it becomes very complicated to sort through it.
So, now I am going to share what I have learned. This sharing part has been a process of its own. I thought of just announcing my top pick, or making a top-five list, or rating them by categories. But, you see it is a little more complicated than that. Choosing the right hosting site for your podcast is going to come down to two main variables: price and features.
One of the major considerations I will cover will be the price. Most podcasters I talk to start out with little to no budget. Any money they might have set aside for the project usually goes towards buying a decent microphone. The need for a more complex setup, especially multiple microphones for multiple hosts, can end up costing a lot more than planned. So, the price might end up becoming the most critical determining factor. Back in July, I wrote about some hosts that offer free plans. But, even if you have set aside a decent budget, there is no need to spend more than you need for features you aren't going to use.
I have been writing about features in my last several posts. We have covered space issues like bandwidth, upload, and storage limits. I also spent a post writing about analytics and the different depth of statistics offered by different hosts. Finally, I reviewed the various options for monetization or making money with your podcast.
Now, it is time to sort through some of the most popular hosting sites to see how they compare through the lens of price and features. These are not in any rating order. This list is just designed to let you see, at a glance, the pricing, and features of some of the options.
The first listing is an example. It is there to offer links to more information on that particular category of information.
I have added a category not covered in the posts on features. Back in an earlier post, I wrote about hosting vs. syndication. So, for this list, I have added a section on Syndication Help. This covers how much assistance the host offers in getting your podcast syndicated on platforms like Apple Podcasts, Google Podcasts, Stitcher, Spotify, etc.
Sample
www.sample.com
Price:
Monthly Upload Limit: Read more.
Storage Limit: Read more.
Bandwidth Limit: Read more.
Analytics Features: Read more.
Monetization Options: Read more.
Syndication Help: Read more.
Other Notes:
Anchor
www.anchor.fm
Price: Free
Monthly Upload Limit: Unlimited
Storage Limit: Unlimited
Bandwidth Limit: Unlimited
Analytics Features: Total plays, all-time, plays per episode, overall podcast plays (per day, week, and month), episode downloads (per day, week, and month), how people listen (website, iTunes, Google Play, etc.) (per day, week, and month).
Monetization Options: Built-in listener support option
Syndication Help: Anchor does all the heavy lifting for syndication. Once you launch your podcast, they will work to get it syndicated on every possible platform. Since moving my podcast to Anchor, it has been listed on Google Podcasts, Spotify, Breaker, Castbox, Overcast, Pocket Casts, Radio Public, Stitcher, and iTunes.
buzzspout
www.buzzsprout.com
Price: Free or $12/$18/$24
Free Plan Monthly Upload Limit: 2 hours
Free Plan Limitations: Content deleted after 90 days
Monthly Upload Limit: 3/6/12 hours
Storage Limit: Unlimited
Bandwidth Limit: 250GB
Analytics Features: Total listeners, plays per episode, plays over time, most popular episodes, how people listen.
Monetization Options: None
Syndication: Provides assistance for registering with Apple Podcasts, Google, Spotify, Stitcher, Alexa.
Notes: Features free podcast website, will optimize most audio file types, 128k Stereo Optimization available for $6/month.
blubrry
www.blubrry.com
Price: $12/$20/$40/$80
Monthly Upload Limit: None
Storage Limit: 100MB/250MB/500MB/1000MB
Bandwidth Limit: Unlimited
Analytics Features: Total & Unique Downloads, Platforms, Client Apps (top 10), Distribution, Traffic Sources (top 10), Certified on demand, World Demographics (top 10). Professional analytics available for $5/month.
Monetization Options: Podcast advertising platform built-in.
Syndication: Optimized for syndication on all major platforms.
Notes: Comes with free PowerPress Wordpress site.
PodBean

www.podbean.com
Price: $5/$14/$39/$129 or $3/$9/$29/$99 when purchased yearly.
Monthly Upload Limit: 100MB/Unlimited
Storage Limit: NA
Bandwidth Limit: 100MB per month/Unlimited
Analytics Features: Basic stats for $5 plan. Other plans include advanced stats: trends, geo-location, platform, etc.
Monetization Options: Podbean Podcast Advertising Marketplace + Crowdfunding.
Syndication: Support for iTunes and Google Podcasts
Notes: Comes with a custom website. Unlimited Plus and Business plans support video podcasting and multiple podcasts.
Libsyn
www.libsyn.com
Price: $5/$15/$20/$40/$75
Monthly Upload Limit: 50MB/250MB/400MB/800/MB/1500MB
Storage Limit: NA
Bandwidth Limit: Unlimited
Analytics Features: Basic stats for $5 plan (add advanced for $2/month. Other plans include advanced stats: total downloads, unique downloads, social stats, date ranges, per-episode, geo-location, platform
Monetization Options: Available on LibsynPRO platform. More info at: https://www.libsyn.com/libsyn-pro/
Syndication: OnPublish – Multiple Destination Publishing.
This is not an exhaustive list of providers. My only hope is that this will help you make an informed decision when choosing a podcast host. If I missed anything on any of the providers or you have a favorite you would like me to look at, please let me know in the comments or drop me a line at provoiceguy@gmail.com.
In the meantime, check out my podcast here.
If you are looking for a professional intro for your podcast, I can help. Check out my professionally voiced and produced podcast intros starting at $10.
If you want to check out some of the equipment I used in my own studio or write about on this blog, you can read more here.

Starting Your Own Podcast: Monetization (Making Money)
Are you starting your own podcast? Are you hoping to monetize it, in other words, are you hoping to make some money? That is something you will want to think about before choosing your podcast hosting provider.
Starting Your Own Podcast: Monetization (Making Money)
Are you starting your own podcast? Are you hoping to monetize it, in other words, are you hoping to make some money? That is something you will want to think about before choosing your podcast hosting provider.
Anchor.fm offers built-in listener support options (see below.)
Maybe you are not trying to get rich or make a living as a podcaster but just hoping to afford a microphone upgrade or pay your hosting fees. There are a few ways to create an income stream from your podcast.
Different hosts have different options when it comes to monetizing your podcast. Even if you are not thinking about that yet, you might want to know what your host will offer if and when you decide to try to make it a money maker, or at least make enough to buy some cool new headphones.
Before we get into the details, a word about ethical and legal issues. I am not going to go into them here because this is not a legal blog. I just need to make clear, there are ethical and legal issues related to podcast monetization. They mainly focus on transparency. If you are making money off something on your show, or someone is paying you to say something or promote something, you need to tell people.
As we look at the different types of money making techniques for podcasts, I will point out any features you might need from your podcasting host to make this happen
Monetize Your Podcast with Pre-Roll and Mid-roll Ads
Podbean offers its own platform for pre-roll, mid-roll, and post-roll ads.
If you listen to many podcasts, you have likely heard a pre-roll or mid-roll ad. Pre-roll ads are usually ten to fifteen seconds and happen right before the episode starts, and mid-roll ads are either thirty or sixty seconds and happen somewhere during the episode.
Most of these ads are read by the host of the show either from a script or a set of bullet points. They are paid on a CPM (cost per thousand listeners basis.) Minimum listenership depends on the company you work with and varies from 100 to 1000 listeners per episode. That means, for many, it will take a while to get to a point where advertisers are interested.
What You Need from Your Podcast Host to Monetize Your Podcast with Pre-Roll and Mid-roll Ads
In theory, you can insert ads into your podcast with any host, unless they have a specific prohibition against it. However, there are a couple of features that might make things easier:
Dynamic Ad Insertion
You could record your ad right into your podcast. That works. However, if you only commit to running the ad for a limited time, you would either need to go back, edit it out, and then re-upload the episode or just leave it there forever for free.
Dynamic Ad insertion allows you to program breaks into your podcast and then automatically insert ad content whenever you want to. This means you can turn the ads on when the campaign starts and turn them off when it is over.
Podcast Host Ad Networks
Some hosts build podcast advertising right into their platform and allow users to opt into running ads from their network. Podbean and Blubrry are two of the hosts that offer this service. There are pros and cons to this all in one solution. If easy is your main priority, this might be worth looking into.
Monetize Your Podcast with Affiliate Marketing
Affiliate marketing is much easier to get started with especially if you still have a relatively small audience. Affiliate marketing allows you to get a small commission when someone buys something from an advertiser through your link.
This blog makes a teeny-tiny amount of revenue through affiliate marketing. If you click on the link of a product I have mentioned on the blog or on my equipment page, you get sent to Amazon.com. If you buy the product, or something else while you are there, I get a little commission from Amazon (which I spend on more stuff for my studio.)
It works the same way with podcasting. All you need to do is create a unique link that leads to the affiliate website (and includes your affiliate code) and share that during your episode. Just like with any advertising the better job you do of promoting the product, the more likely people are to buy it.
So, for example, I really like my Focusrite Scarlet Solo Digital Audio Converter. I could say during my show, "If you love the way the audio sounds on this podcast, you can give some of the credit to my Focusrite Scarlet Solo. You can learn more about it and purchase one at provoiceguy.net/focusrite, and you will also be helping to support this podcast."
I went ahead and set up that link so you can see what it looks like. The purchase link goes straight to Amazon and lets them know it came from me. So, if you buy one, thanks!
Don't forget to include these links in your show notes.
What You Need from Your Podcast Host to Monetize Your Podcast with Affiliate Marketing
You really don't need anything and can easily record this right into your podcast. However, just like with pre-roll and mid-roll ads, you might decide to run these for a limited time.
I could see setting up some different affiliate links and inserting them at different times into various episodes. This would also be handy if the affiliate discontinued their program (or kicked me out of it!)
Monetize Your Podcast by Selling Your Own Stuff
If you have a product or service of your own to sell, you can skip all of the above practices and just use your podcast to promote your own products and services. That is currently the only monetization method I use on my own podcast. Since I create podcast intros and outros, it makes sense to mention that at some point during the show. You never know, someone may listen and decide to purchase one. You can do that here. Thanks!
What You Need from Your Podcast Host to Monetize Your Podcast by Selling Your Own Stuff.
Really, nothing.
Monetize Your Podcast by Asking for Donations
You are not likely to fund a lavish lifestyle through listener donations, but you might just cover your podcasting costs and maybe be able to upgrade some equipment. Some podcasts actually have a decent revenue stream through donations, but it is going to depend on your listenership. You can set up a donation link using PayPal, Stripe, Patreon, or even directly through your host (more on that in a moment.)
The rest is up to your delivery. You will need to give your listeners a compelling reason to give you money for something they get for free!
What You Need from Your Podcast Host to Monetize Your Podcast by Asking for Donations
Nothing really. However, Anchor has just set up what is probably the easiest method for monetizing your podcast through donations. If you host your podcast on Anchor, which is totally free, you can set it up with just a couple of clicks. Yes, they get a cut but so does PayPal, Stripe, and Patreon. The only way to avoid fees would be to have people send you checks.
So, Where Do You Start?
I recommend doing some serious research before you get started. If you are just getting started with a podcast, take some time to grow your audience and episodes. Pre-Roll and Mid-Roll advertisers will want to see a little history behind your show. Make sure you know what you are getting yourself into and be sure you feel comfortable giving your airtime and reputation in exchange for money.
Good luck!
You can check out my podcast here.
If you are looking for a professional intro for your podcast, I can help. Check out my professionally voiced and produced podcast intros starting at $10.
If you want to check out some of the equipment I used in my own studio or write about on this blog, you can read more here.