Podcast Tips: Making Your Podcast Sound Better

Looking for some podcast tips? Want to make your podcast sound better? Keep reading.
So, you have started a podcast, or you are getting ready to make the leap. But, when you listen to your recordings, they don't sound the same as some great podcasts you listen to. What can you do to improve your sound quality? What can you do to make your podcast to sound as good as professionally produced podcasts?
Good news! Podcasting is the great equalizer when it comes to quality. You don't need access to a professional recording studio or a team of engineers to compete with the pros. There are some inexpensive, downright cheap, and free methods you can use to up your sound game.
Start With Your Space
The best place to start for great sounding audio is the space you are recording in. First of all, you need to get away from noise. Background noise can be distracting. Even if you manage to filter it out with noise reduction or noise gates, it still impacts the quality of your sound.
(Don’t worry if “noise reduction” or “noise gates” are new to you. I will cover them in the next post.)
Noise
Noise comes from more sources than you can imagine.

Leaf blowers DO NOT help your podcast sound better.
People talking in your home (or next door, upstairs, or outside.)
Heaters and air conditioners (both the sound of air coming out of vents and the mechanical noise.)
Plumbing (A toilet flush makes a lot of sound!)
Lawnmowers and leaf blowers
Traffic
Bugs (really, cicadas are not my friend.)
Acoustics

The right acoustics can help make your podcast sound better.
Noise is only one issue you need to deal with. The general acoustics of the room you are in play a critical role in your sound. If you are serious about your podcast, you could invest in a complete sound conditioning of your room. This would take care of muffling outside noise and improving the acoustic. But, if you are on a budget or are not able to make any modifications to your space, you can still get professional sounding audio.
The biggest acoustical issue most podcasters deal with is echo. As I listen to some podcasts, I can picture the room. Often, it is a spare room with little in it. Sometimes it sounds like it doesn't even have carpeting. This creates a hollow, echoey sound. Many listeners wouldn't recognize it as hollow or echoey, they just notice that it doesn't sound right and it doesn't sound like some other great podcasts. If the echo is too much, it even becomes difficult to make out the words being spoken. Combine this with a less than adequate microphone, it sounds less like a podcast and more like talking to someone on a bad speakerphone.
More Stuff = Less Echo
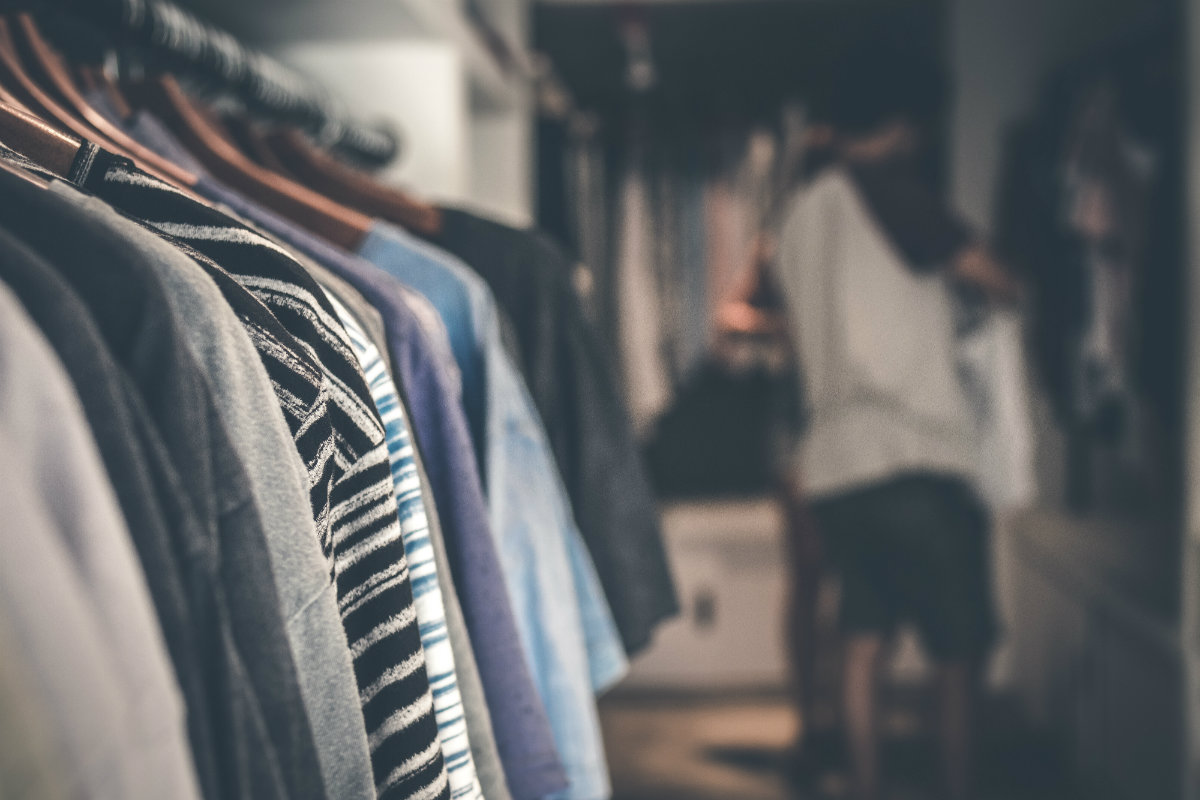
Believe it or not, recording in the closet can help in making your podcast sound better.
To make improvements, the most straightforward technique is to get more stuff in the room, especially on the flat surfaces. Acoustic panels are a great way to go, but you can still improve sound with materials you have lying around the house. Hang blankets on walls, put more furniture in the room, lay down a carpet. Anything you can do to keep that sound from bouncing around will reduce the echo and improve the sound quality.
If that isn’t impractical, one solution that won't cost a dime is: go in the closet. There have been several times in my career that I have found myself cutting vocals in a closet, and the more clothes, the better. A closet full of clothes muffles the external noise and eliminates echoes. The acoustics of some closets are as good as some professional sound recording booths.
Be creative. I know one voice-over artist who created a sound booth by hanging some heavy-duty moving blankets creating a sort of three-sided tent around her. I can't say it looked great, but the sound improvement was impressive.
Check Your Microphone
It is smart to start with your space. Even the best microphones won't produce great sound in a room with poor acoustics. In fact, some types of higher-end microphones will actually make acoustical problems worse by picking up more of the noise and room ambiance. Once you get your room noise and acoustics under control, the next place to look for sound improvement is your microphone.
Fortunately, I have already written an entire post (and produced a podcast episode) on microphones. On the blog and on the podcast, I even offer sound samples from the three microphones I recommend. All of the mics I reviewed were USB. These are mics that plug directly into your computer.
For some variety, I am going to offer three options here: a true budget option, an upgraded budget option, an entry-level professional option, and an "I'm all in" option
Budget Option
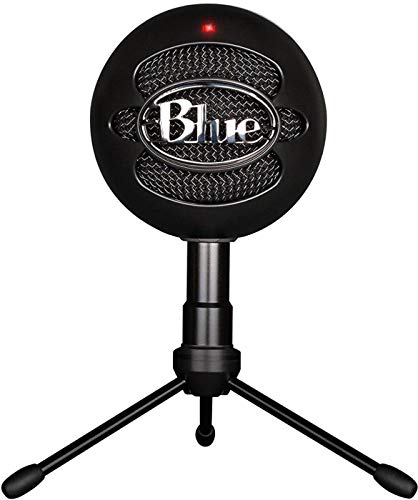
Blue Snowball iCE Condenser Microphone, Cardioid - Black
As I wrote in my post on microphones:
I still can't believe that you can pick one of these up for around $50. I also see them at pawn shops for half that. While it doesn't have quite the depth and clarity of the Blue Yeti, honestly, most people will never know the difference.
It lacks the multiple pickup patterns of the Yeti as well as the 3.5mm headphone jack. However, if you don't need those features, this is a great mic. If you are just starting your own podcast, this is a great place to start.
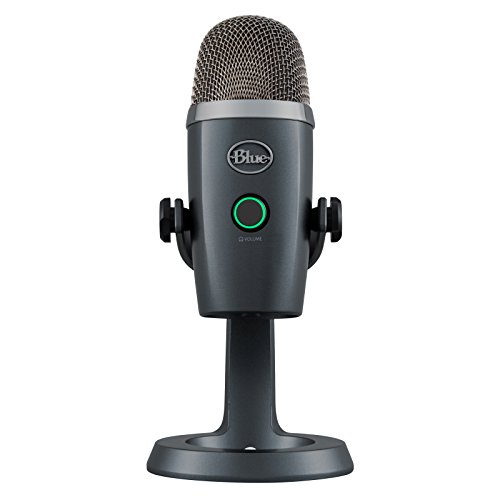
Upgrade (But Still on a Budget)
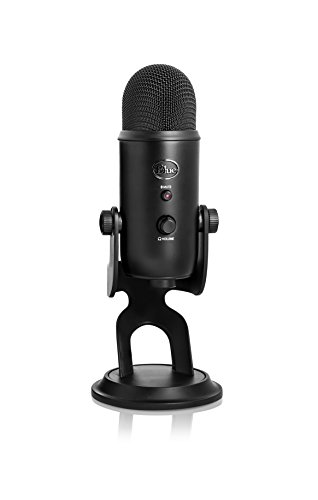
Blue Yeti USB Microphone - Blackout
From my microphones post:
As someone who had the privilege of working on some iconic microphones (including the industry standard ElectroVoice RE20), I still amazed by the sound quality of this offering from Blue. Some audiophile will likely leave a comment explaining why these are no good and I should throw mine out, but I use this thing day in and day out and it always produces surprisingly good results.
The Yeti is actually three microphones in one. With three onboard condenser capsules, you can select the pickup pattern. That means you can set it to only record the sound coming from directly in front (great for one voice), the sound coming from the front and back (great for interviews), or the sound for all directions (great for recording music or multiple voices.)
Entry-Level Professional
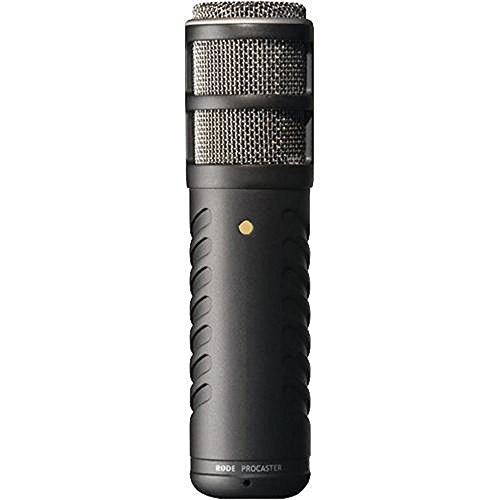
Rode Procaster Broadcast Dynamic Vocal Microphone
When it comes to professional-level microphones, audio experts have feuded forever on the topic. You can get endless advice but it really comes down to the unique tone of your voice and the equipment you are working with.
There is also much discussion to be had about dynamic vs. condenser microphones. That is beyond the scope of this post, but this is a dynamic microphones.
Despite all that, for under $250, this is an impressive microphone. But with a professional grade microphone with its XLR connection, you are going to need a USB Audio Interface.
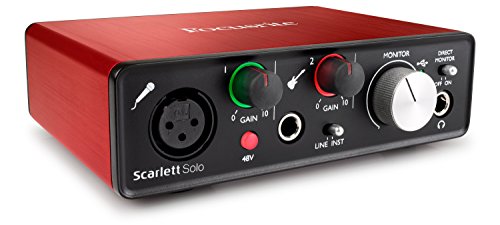
Focusrite Scarlett Solo (2nd Gen) USB Audio Interface
For a podcast, this is all you really need to connect your microphone to your computer. It’s high-end enough to be virtually noise-free and has just enough features for a podcaster. The only reason to spend more than the $110 this one costs, would be if you plan on having multiple microphones for co-hosts or guests.
“I’m All In”

Shure SM7B Vocal Dynamic Microphone, Cardioid
Okay, at this point, I am just picking one of many options. Though, at under $400, this is a pretty amazing microphone. I sat behind a similar model for years at a rock radio station where I worked. Again, results depend on your unique vocals and other equipment.
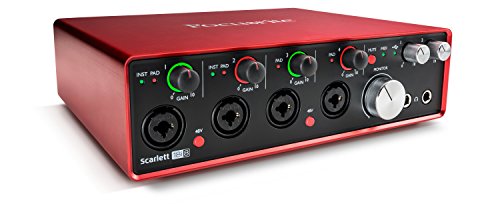
Focusrite Scarlett 2i4 (2nd Gen) USB Audio Interface
Well, since we are buying $400 microphones, perhaps we will have some guests in the studio. This upgrade has four mic-preamps – which means you and three guests can plug in and sound great.
Leverage Your Software
Once you have your room acoustics under control and have found a decent microphone, you can let your software assist you the rest of the way. Software can also help if you haven't been able to deal with the sound of the room or microphone quality, but software does its best work when you are starting with a clean, high-quality signal.
I will spend the entirety of my next post discussing how software can make you sound better!